
7 Reasons + Solutions: Cannot Turn On File History Windows 10
If you're unable to turn on File History in Windows 10 and see errors like "Could not enable File History," common fixes include checking drive permissions, ensuring the storage device is properly connected, restarting the File History service and more. This guide provides detailed troubleshooting steps to resolve the issue.
By Emma / Updated on April 10, 2025
Help! I Cannot Turn on File History in Windows 10 PC
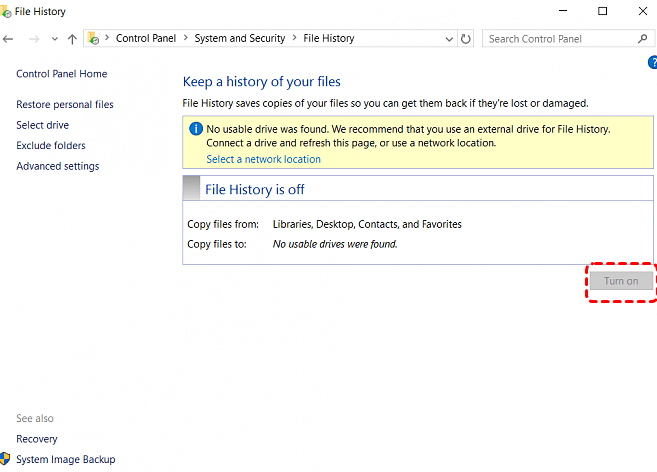
File history is turned off and I'm not able to turn it back on. The "Turn On" button is grayed out. I'm not sure how this happened, but believe it was while trying to backup files and folders. How can I turn file history back on, with the button grayed out?
Common Reasons Why File History Won't Turn On
File History is Windows' built-in backup solution that automatically saves versions of your files to an external drive or network location. While convenient, several factors can prevent it from activating properly. Here are the most common reasons why you cannot turn on File History as usual:
- Drive Detection Issues
The feature requires a dedicated storage destination, but may fail if Windows can't properly recognize your connected drive.
- Storage Capacity Problems
File History needs substantial free space to maintain multiple file versions. If your selected drive lacks sufficient capacity (generally double your source files' size), the feature will refuse to activate.
- Drive Format Compatibility Limitations
Only NTFS or exFAT formatted drives are supported. FAT32 drives, while readable by Windows, won't work with File History due to file size (maximum file size limit of 4GB) and permission limitations inherent to the older format.
- Network Configuration Errors
If you are backing up to network locations, authentication failures, incorrect path mappings, or intermittent connectivity can all prevent successful setup.
- System File Corruption
Critical Windows components that manage File History may become damaged. This manifests as grayed-out options or error messages when attempting activation, often resolvable through system repair tools.
- Group Policy Restrictions
In managed environments, administrators frequently disable File History through Group Policy to enforce corporate backup solutions. These settings override individual user attempts to enable the feature.
- Operating System Bugs
Older Windows versions contained specific File History bugs since patched in updates. Running outdated builds often leads to unexplained activation failures that resolve after updating.
Troubleshooting "Could Not Enable File History" in Windows Computer?
As shown above, the "Could not enable File History" issue may stem from various causes. Identifying your specific scenario is the first step toward resolution. For your convenience, we've prepared step-by-step solutions for each potential cause:
Solution 1: Check the Connection
If you are planning to use USB flash drives to back up files using File History, please first unplug and reconnect the drive. Try a different USB port (preferably USB 3.0+ for better performance).
If you are using an external HDD/SSD, ensure it’s properly powered (some need an external power). For network drives, verify the network location is accessible (open it in File Explorer) and ensure the shared folder permissions allow read/write access.
Solution 2: Verify Drive Space
File History requires adequate free space to store multiple versions of your files. If activation fails due to insufficient storage, follow these steps:
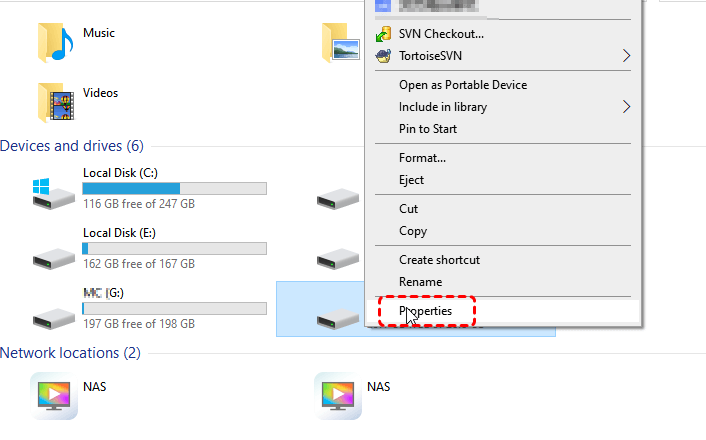
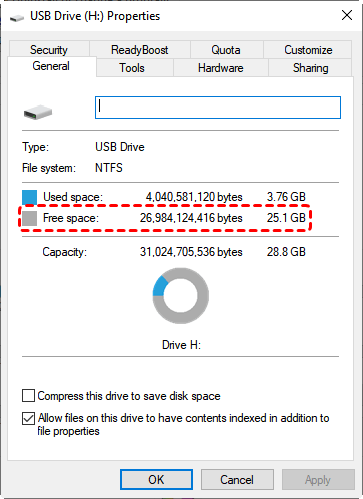
1. Check Current Drive Space: Open File Explorer (Win + E). Right-click your backup drive, select “Properties”, and check the available space(compare to your source files' size).
2. Remove Unnecessary Files: Remove old backups, temporary files, or large unused files.
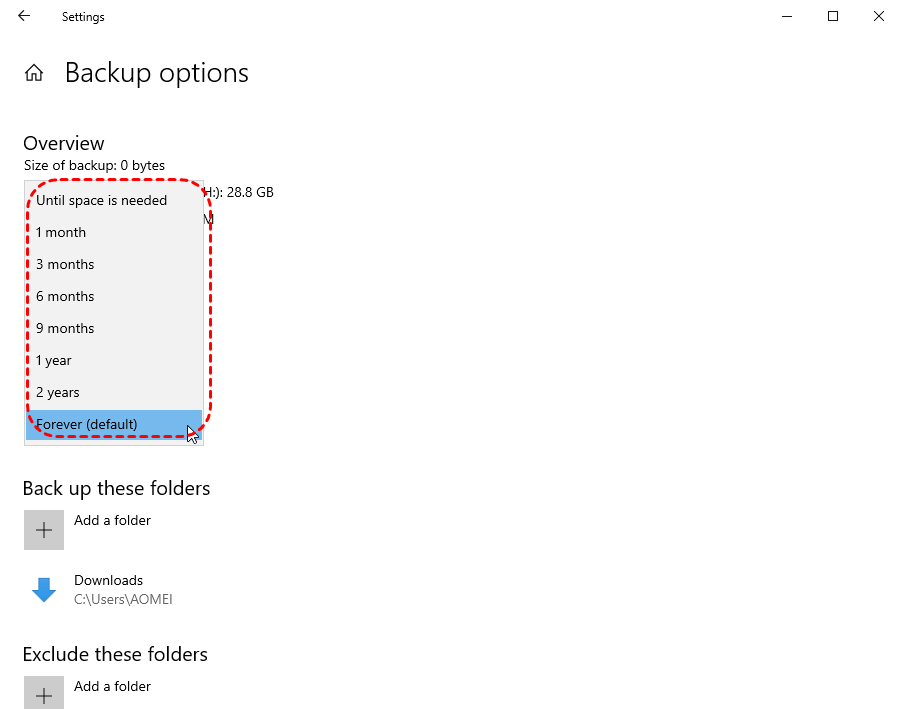
3. Adjust File History Retention Settings: Go to "Settings"-> "Update & Security"-> "Files backup". Click "More options". In the Backup options windows, change backup retention period and tick "Until space is needed" (recommended for limited space)
If all do not work, try another larger drive as the backup device.
Solution 3: Format the Drive File System
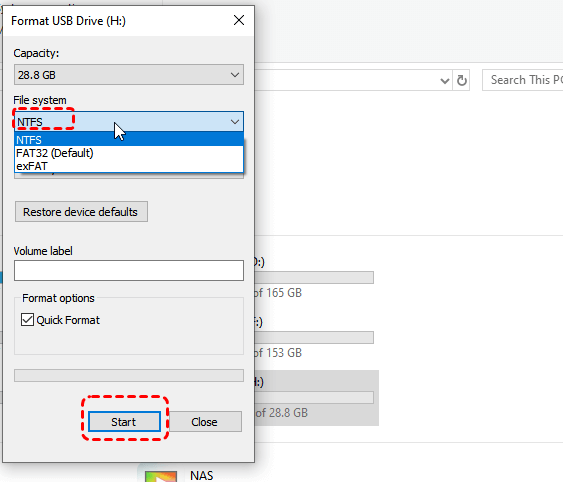
If your backup drive is of FAT32 file system, you had better format it to NTFS or exFAT, either of which support larger files. For a quick format, you can just right-click the drive in Windows File Explorer, select “Format”and choose NTFS or exFAT. Finally click on “Apply”.
Please note that formatting process will erase all data on the drive, so make a backup if necessary or you need to find ways to recover data from formatted drive.
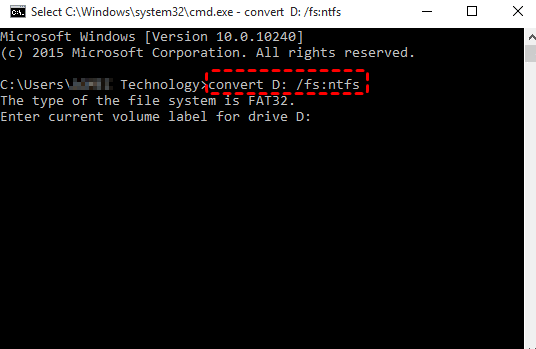
However, if you want to format FAT32 to NTFS without losing data, try convert command: Open Command Prompt as Admin (Win + X -> Command Prompt Admin). Type command :convert X: /fs:ntfs (Replace X with your drive letter).
Solution 4: Check Network Configuration
When backing up to network locations, these steps will help resolve common connection and permission issues:
Test network access :Open File Explorer → Enter \\[server-name]\[share-name] in address bar. If prompted, enter correct credentials.
Configure Proper Share Permissions: On the NAS/Server:right-click shared folder->Properties->Sharing ->Advanced Sharing. Verify the share name matched what you are connecting to and the "Permissions" give Full Control to your user. Under Security tab, add your user with “Modify” rights.
For Windows PCs: In File History settings ->Select drive. Click “Add network location”. Enter full path as \\[server-IP]\[share-name] (IP is more reliable than name)
Solution 5:Repair Corrupted System Files
Damaged Windows system files can break File History functionality. Running the System File Checker tool ("sfc /scannow" in Command Prompt) can automatically detect and repair these issues.
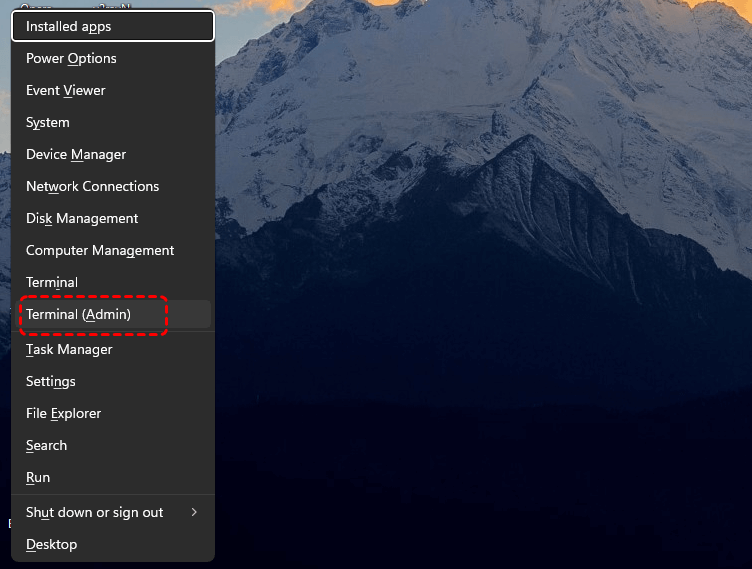
Open Command Prompt as Admin: Press "Win + X"->Select "Terminal (Admin)" on Windows 11 or "Command Prompt (Admin)" on Windows 10.
Type DISM.exe /Online /Cleanup-image /Restorehealth and press Enter.
Type sfc /scannow and press Enter to scan system files and replace corrupted files with a cached copy.
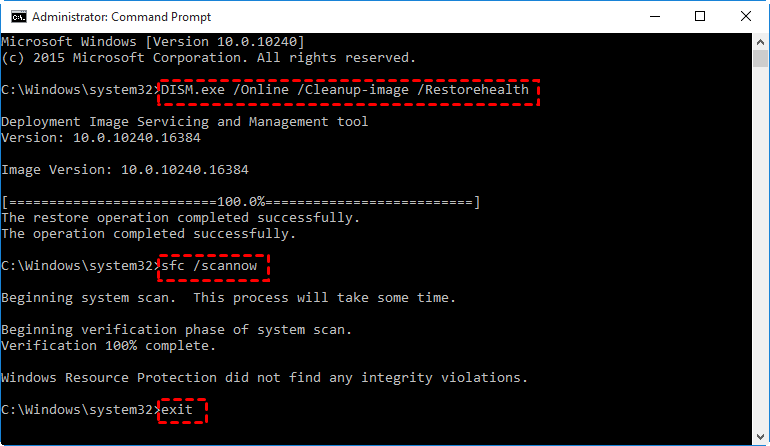
Once done, type exit and press Enter to exit Command Prompt.
Solution 6: Change Group Policy
In some workplace or school environments, administrators often disable File History through Group Policy. In such cases, you can contact them to change the setting to solve the problem “cannot turn on File History Windows 10”.
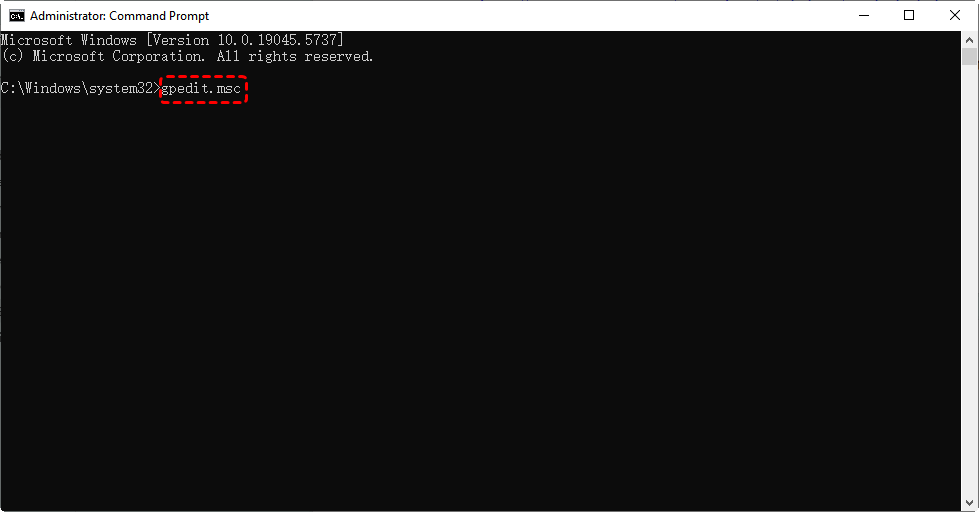
1. Run Command Prompt as administrator, type "gpedit.msc" and hit Enter to open Local Group Policy Editor.
2. Navigate to the following path: "Computer Configuration" > "Administrative Templates" > "Windows Components" > "File History".
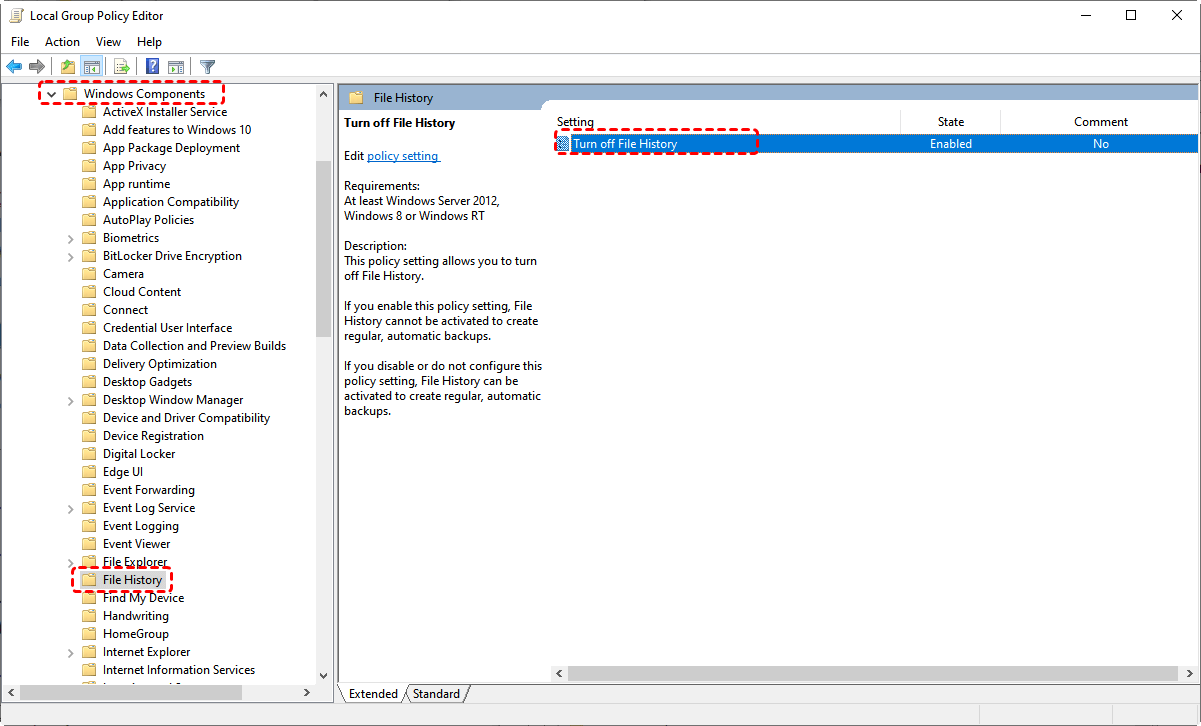
3. In the right-hand pane, double-click on Turn off File History. In the new window, tick Disabled and apply the changes to activate File History.

Solution 7: Fix Operating System Bugs
Many early Windows releases (like Win10 1809 or initial Win11 builds) contained File History bugs that Microsoft later patched. If you experience “can’t turn on File History”in Windows 10 or Windows 11, please check if you have updated the Windows.
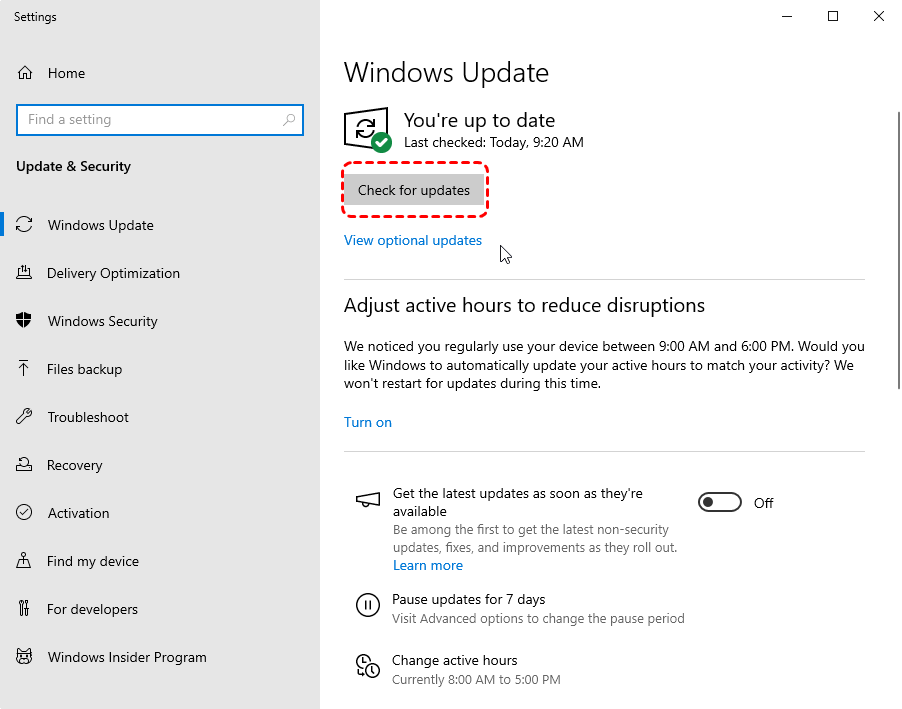
Open Settings (Win + I). Go to Update & Security->Windows Update. Click Check for updates and install all available updates. Don't forget optional updates which often contain important fixes
Workaround: Recover Files Without File History Backup
When File History isn't available or you still could not enable File History Windows 10 after the above troubleshooting attempts, MyRecover provides a powerful yet user-friendly alternative for retrieving lost documents, photos, videos, and more. Here's how to use it effectively:

- 1000+ File Formats Supported: Recover documents (PDF, DOCX), photos (JPEG, PNG), videos (MP4, MOV), audio files (MP3, WAV), archives (ZIP, RAR), and more.
- Quick & Deep Scanning: Fast scans for recently deleted files. Deep scans for more complex recoveries, such as formatted drives or corrupted partitions.
- Preview: Before restoring, preview recoverable files to verify their integrity.
- User-Friendly Interface: Designed with simplicity in mind, the intuitive layout guides you through the recovery process step by step.
- All Storage Compatible: Works seamlessly with HDDs, SSDs, USB drives, SD cards, external storage, and even damaged or inaccessible devices.
Step 1: Get MyRecover from the official website and install it on a different drive than the one containing lost files.
Step 2: Launch the software, select the target drive/folder, and choose "Scan".

Step 3: When the scanning process is completed, choose target files or folders and click on “Recover”.

Step 4. Save them to a safe location (not the original drive).

Final Thoughts
If youcannotturn on File History in Windows 10 due to grayed-out options or other errors, follow the troubleshooting steps above to resolve drive, permission, or system-related issues. In most cases, checking connections, updating Windows, or repairing system files can restore functionality.
However, if File History remains inaccessible, MyRecover offers a reliable alternative to recover lost files quickly and securely. Its intuitive interface and powerful scanning make it ideal for retrieving documents, photos, and more—even without a backup.

