How to Format Bootable USB Drive (4 Advisable Ways)
Scroll down and take notes to learn how to format a bootable USB flash drive in Windows 10/11 in 4 different ways.
By Zoey / Updated on January 23, 2025
The bootable USB drive acts as a gateway to a WinPE or Linux environment, facilitating tasks such as running core Windows Server content. However, as needs change or problems arise, you may need to format the USB drive. Whether it's erasing data, changing the file system, or removing viruses or malware, this guide will take you step-by-step through the process of formatting a USB drive. Let's get started.
4 Ways to Format Bootable USB Drive
To format bootable USB drive in Windows 10/11, please read the following part.
Method 1. Format Bootable USB Drive with MyRecover
For third-party applications, we recommend MyRecover, a powerful data recovery software known for its ability to create bootable USB drives, with or without an ISO file, that allow seamless installation of Windows without the need for a Microsoft account. It simplifies the process of creating a Windows 10/11 recovery drive and recovering data from hard drives that won't boot.
Main features of MyRecover:
- Easy-to-use interface: Provides a simple interface to easily create bootable Windows 11 USB/CD/DVD.
- Data Recovery Function: Besides creating Windows 10/11 recovery drive, it can also help you recover more than 200 types of recoverable data, covering photos, videos, office files, zip files, etc.
- Perform Windows 10/11 crashed PC recovery and data recovery with the original configuration, file names and paths intact.
- Compatible with NTFS, FAT32, exFAT and ReFS file systems on Windows 11, 10, 8, 7 or Windows Server PCs.
Please click Download Software to download and install it on your Windows PC.
Here are the simple steps to create Windows 11 bootable USB using MyRecover:
Step 1. Install MyRecover and start the process
Start MyRecover and click “Crashed PC Recovery”. Connect a USB flash drive with sufficient storage space.
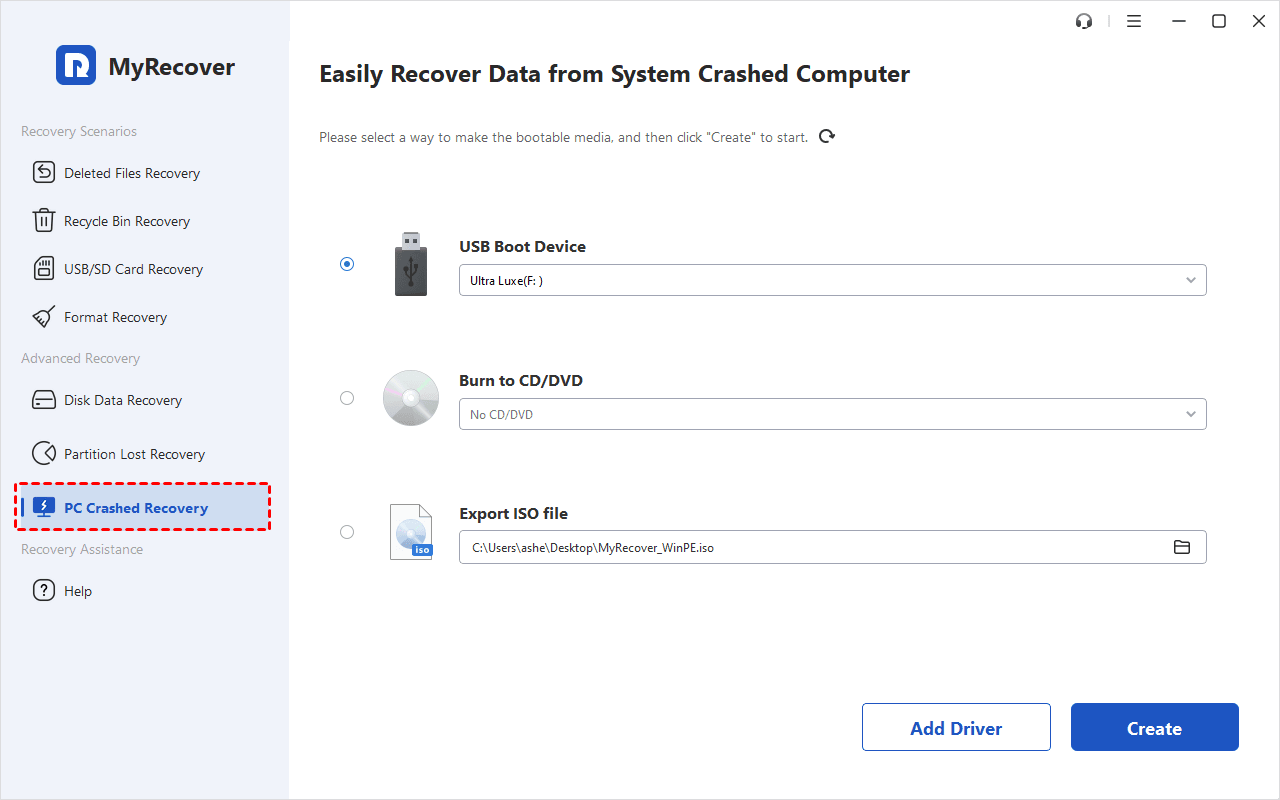
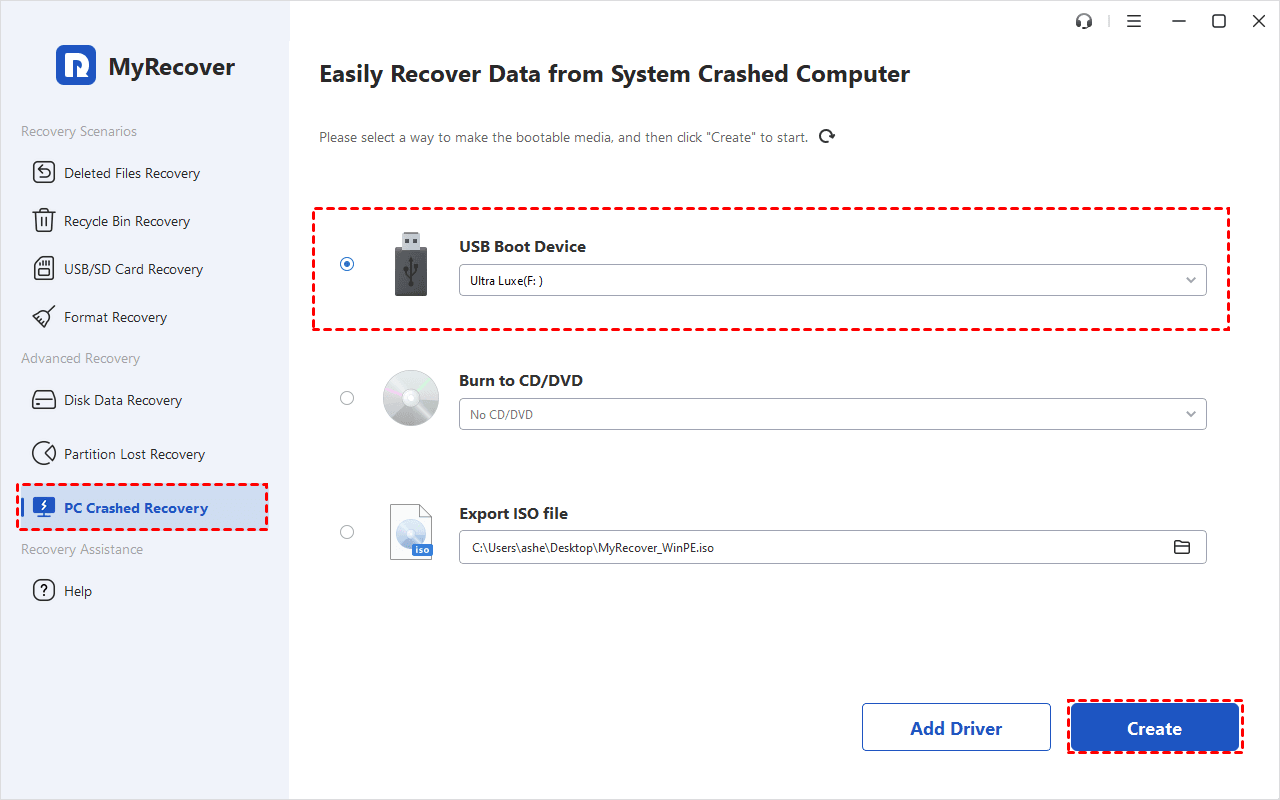
Step 2. Select your bootable disk creation option
In MyRecover, select your USB drive as the boot disk destination and click “Execute”.
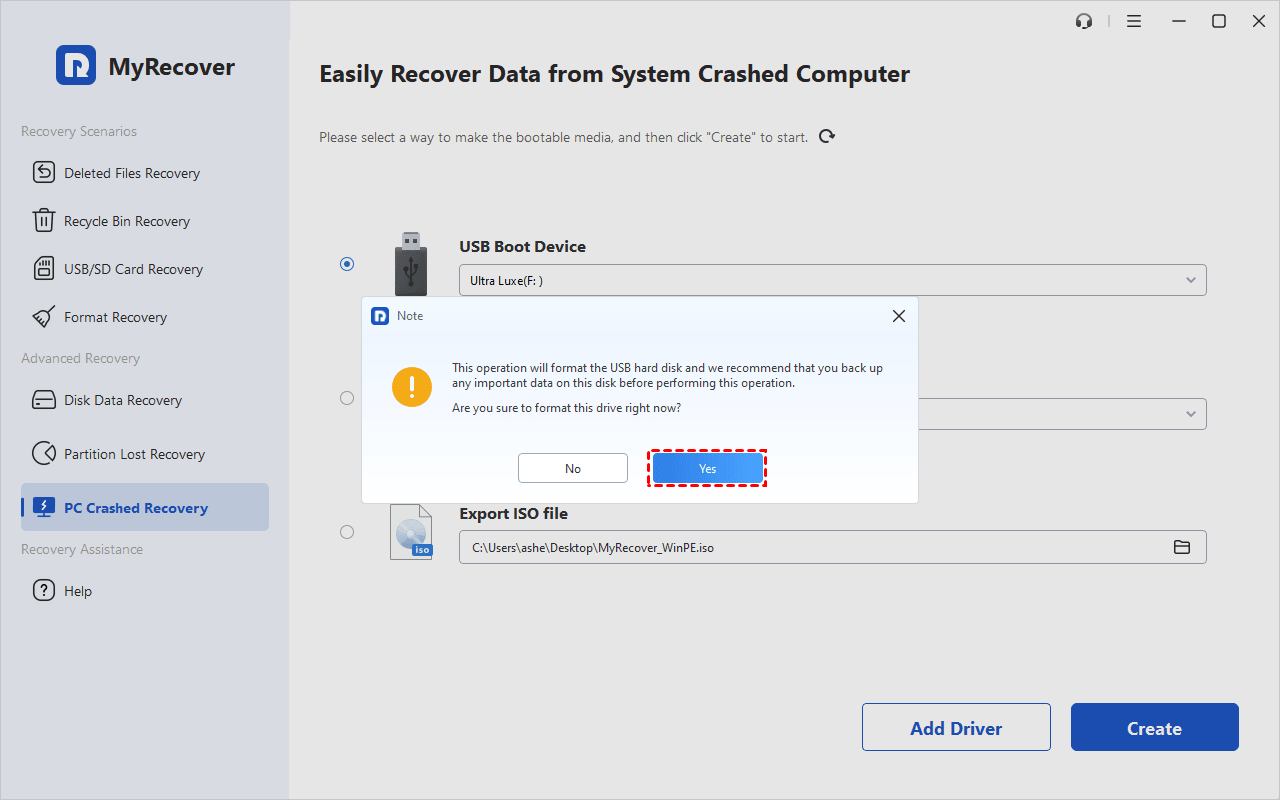
Step 3. Confirm USB Drive Formatting
A notification will inform you that the USB drive will be formatted. Confirm by clicking "Yes", assuming you have previously saved the file.
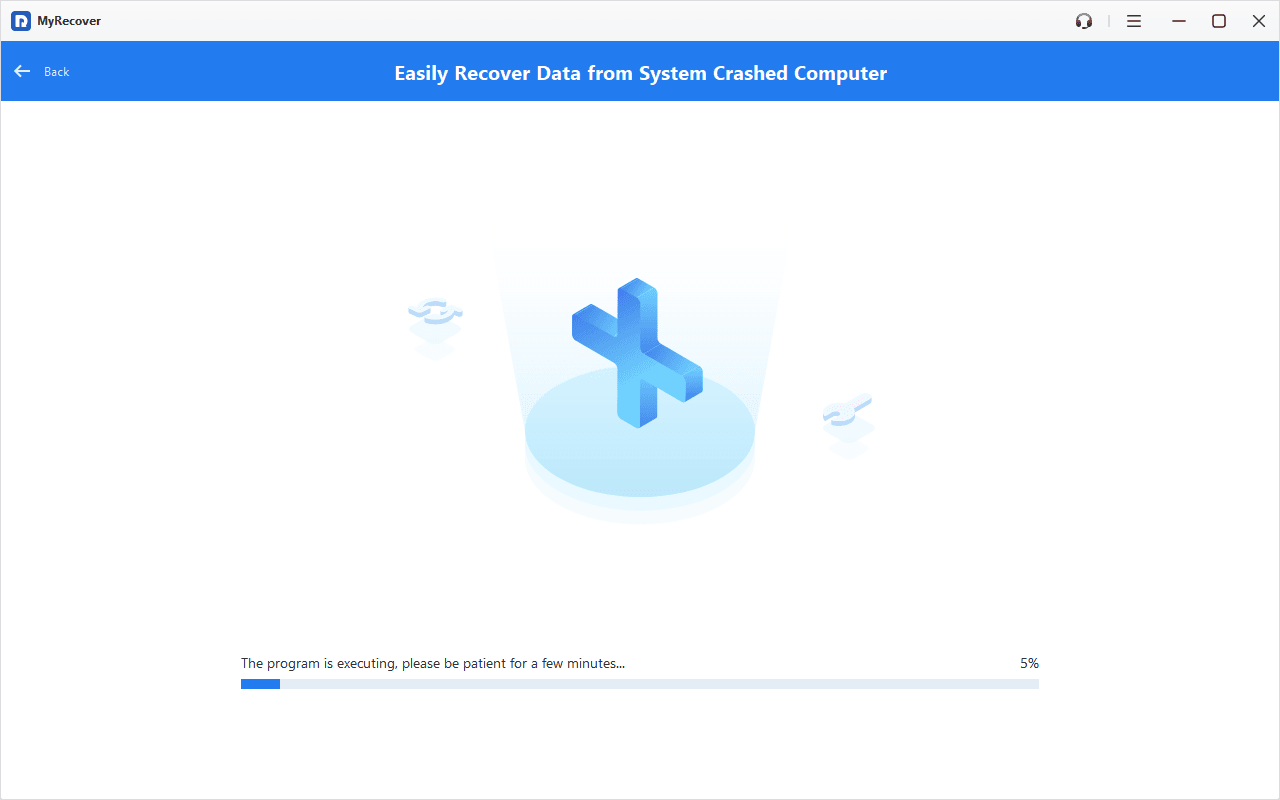
Step 4. Create a Bootable USB Drive
The software will start creating a bootable Windows 11 USB drive. The time required varies depending on your operating system and the speed of your internet connection.
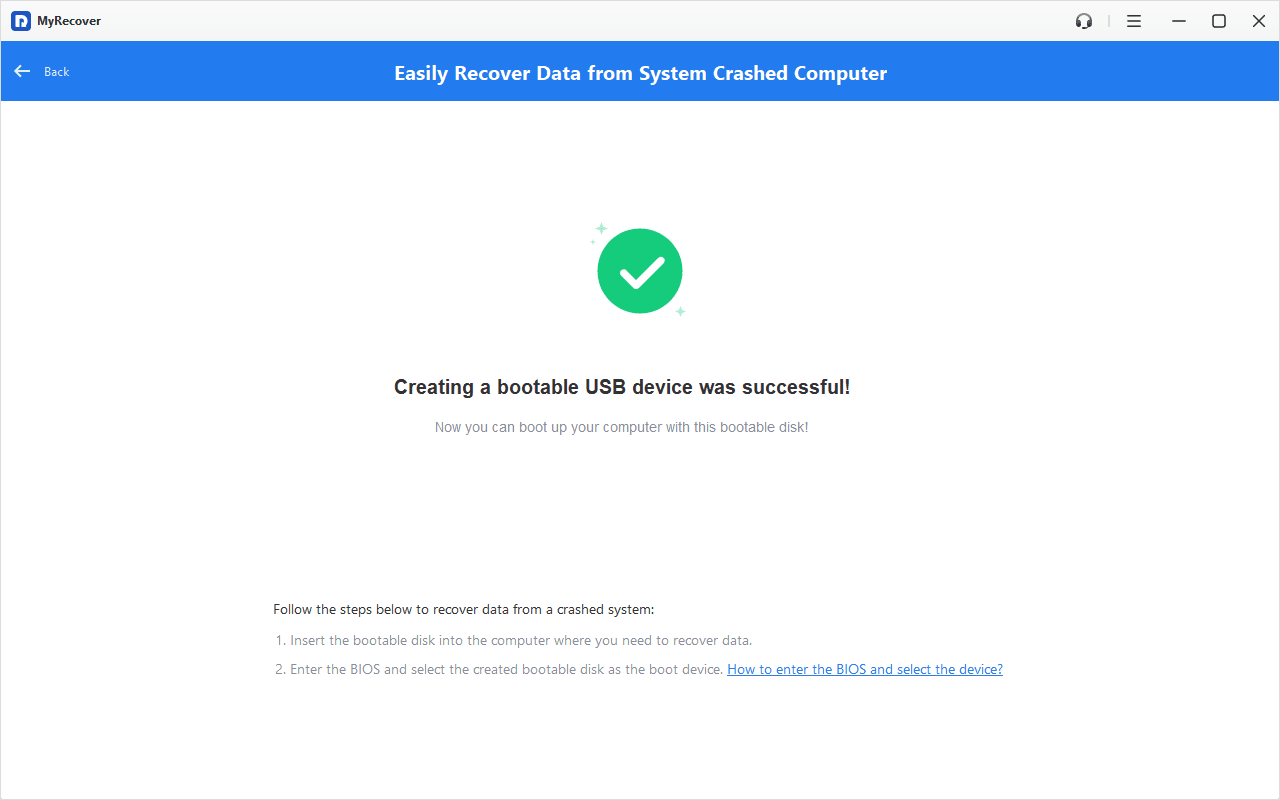
Step 5. Complete the Process
Once the process is complete, a confirmation message will appear, along with instructions on how to boot from the newly created disk.
Method 2. Format Bootable USB Drive with CMD
Command Prompt, often abbreviated to CMD, is a powerful text-based interface that allows you to interact with your computer's operating system through a series of typed commands. Specifically, Diskpart is a primary tool that runs in Command Prompt to manage disks and partitions. It provides an easy way to perform a variety of tasks, from simple operations like moving folders to more advanced tasks like system configuration. When it comes to formatting a bootable USB drive, this tool comes in handy.
To format a bootable USB drive in Win 10/11 using Diskpart, follow the instructions below:
1. Launch Run Windows using Windows + R keyboard shortcut.
2. Type diskpart in the search box and press Enter.
3. Type list disk and press Enter. Now type select disk X (X is the disk number of your booted USB drive).
4. Type Clean and press Enter to continue. It takes a few minutes to erase all your Bios boot files from the USB drive.
5. Type create partition primary in your window and press Enter to create a partition on a bootable USB drive.
6. Immediately type fs=fat32 format or fs=ntfs format, depending on your preferred file system. Select the Enter key to continue.
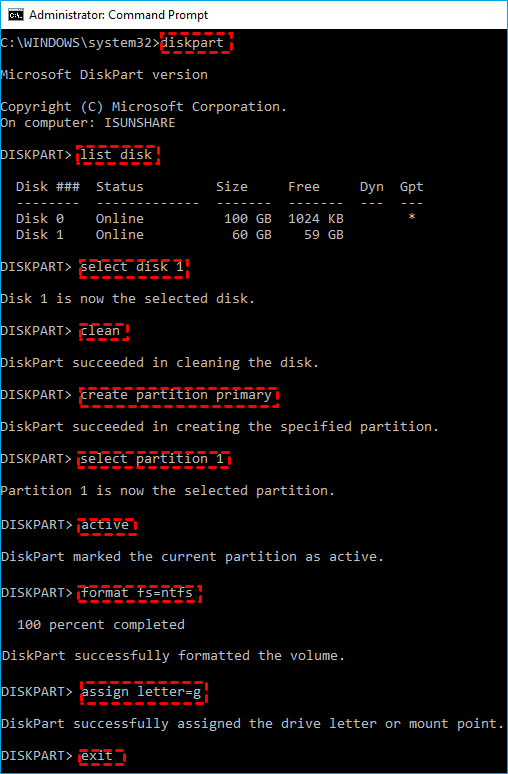
7. Tap Exit and it's done.
Method 3. Format Bootable USB Drive with Disk Management
Besides Command Prompt, you can also boot to a bootable USB using built-in Windows tools, such as Disk Management. Disk Management is an important tool that allows users to manage their computer's storage more efficiently. It provides a graphical interface to perform various tasks related to disk and partial management. Specifically, this tool allows you to create new drives, add volumes, shrink partitions, assign drive letters, and of course, format drives, including bootable USB drive.
Now let's move on to the complete step by step guide on how to format USB drive for Windows 10/11 using Disk Management:
1. Press Windows + R to open the Run window and type diskmgmt.msc in the search box. Press Enter and Disk Management will appear on the screen.
Find the bootable USB drive and right-click it. Select Format.
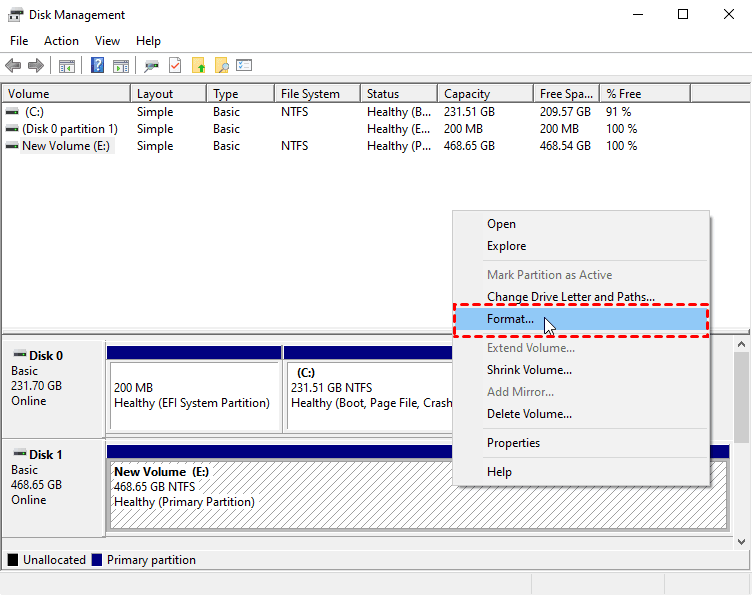
3. Select the appropriate file system and click Default for Allocation Unit Size. Tap OK to complete the process.
Method 4. Format a Bootable USB drive with File Explorer
While using the Disk Management tool to format a USB drive in Windows 10/11 generally works, in some cases it may give the expected results. For example, Disk Management may not handle some USB drives correctly due to complex file systems, rare components, or special configurations.
At this point, File Explorer comes in as the most versatile way to format bootable USB drives in Windows 10/11. Its familiarity and broad compatibility often make it a reliable alternative.
Here’s how to use this technique:
1. Open File Explorer using the Windows keyboard shortcut + E Go to the This PC section and find an openable USB drive.
2. Right-click the bootable USB drive and select Format.
3. Choose your preferred file system between NTFS and FAT32 and select the allocation size. Users can also factory reset the device by tapping Restore Device Defaults to factory settings.
4. Tap Start to format the bootable USB drive.
Tip: How to Recover Data after Formatting a Bootable USB?
You can use this powerful bootable data recovery software MyRecover which combines bootable disk creation with data recovery functions.
Here are the steps to recover data with startup disk
Step 1. Launch MyRecover
Run MyRecover and click PC Recovery on the left. Hover over the drive where you saved the previously deleted files and click Scan.

Step 2. Search for deleted or lost files
It will scan your drive automatically and thoroughly for any data found. Try using a search box or filtering function to quickly find the data you need.
Step 3. Select the files and click Recover
Select the files you want to recover and choose Recover x Files.
To Sum Up
How to format bootable USB drive in Windows 11/10? Simply put, formatting a bootable USB drive in Windows 10/11 is easy in several ways. While the built-in Command Prompt and Windows tools are reliable for formatting a bootable flash drive, you can also turn to third-party software for greater convenience. Recoverit will do it in 3 easy steps if you want to recover data from a formatted USB flash drive.