
How to Recover Deleted Files from a Specific Folder in Windows 10-Easy Steps
Need to restore deleted files from a folder in Windows 10? Follow these proven methods to retrieve lost data quickly and safely. Whether your files were accidentally deleted, lost due to corruption, or wiped from the Recycle Bin, this guide provides step-by-step solutions to get them back.
By Emma / Updated on April 11, 2025
User Case
In Windows 10, I have deleted some files from a folder in Windows Explorer. Afterwards, I reconsidered and wanted those files back; I then went looking into the recycle bin, but it was not there. Is there any way to recover deleted files from a specific folder?
How to Recover Deleted Files from A Specific Folder?
If you accidentally deleted a file from a specific folder on Windows 10, don't panic. There are ways to recover it in different situations. For more details, please keep reading.
Method 1. Check The Recycle Bin
The Recycle Bin recovery method works best when you've recently deleted the file, typically within the past few days or weeks, or you used standard deletion methods like pressing the Delete key or selecting "Delete" from the right-click menu, as these actions send files to the Recycle Bin by default.
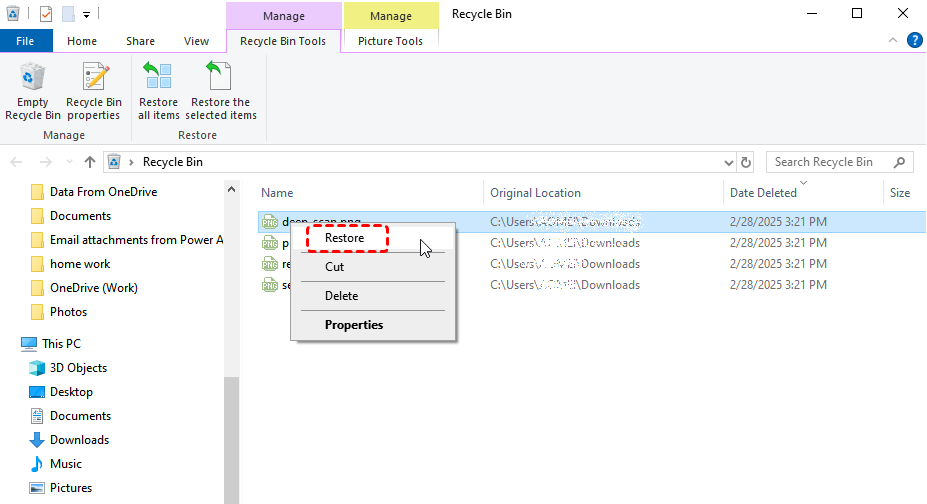
Step 1. Open the Recycle Bin: Double-click the Recycle Bin icon on your desktop. Alternatively, open File Explorer and type Recycle Bin in the address bar.
Step 2. Locate Your Deleted File: Scroll or use the search bar (top-right) to find your file. Files are listed with their original names and locations.
Step 3. Restore the File: Right-click the file and select "Restore" (returns it to its original folder). OR, drag and drop the file to a different folder (e.g., Desktop or Documents).
However, it's important to note that this method won't work if you used Shift+Delete to directly and permanently remove files, or you deleted files from SD card, USB flash drive and other removable disks, which bypasses the Recycle Bin entirely. Additionally, the success of this recovery depends on whether the Recycle Bin hasn't been emptied since the file was deleted - either manually by you or automatically by system settings that clear older files.
Method 2. Use File History for File Recovery
If your deleted file isn't in the Recycle Bin, another option is to check Windows' built-in File History feature. This method works if you had previously enabled File History backups on your system. Unlike the Recycle Bin which only stores recently deleted items, File History maintains regular snapshots of your files over time, allowing you to recover older versions or deleted content.
Step 1: Locate the Original Folder: Open File Explorer and carefully navigate to the exact folder where your deleted file was originally stored.
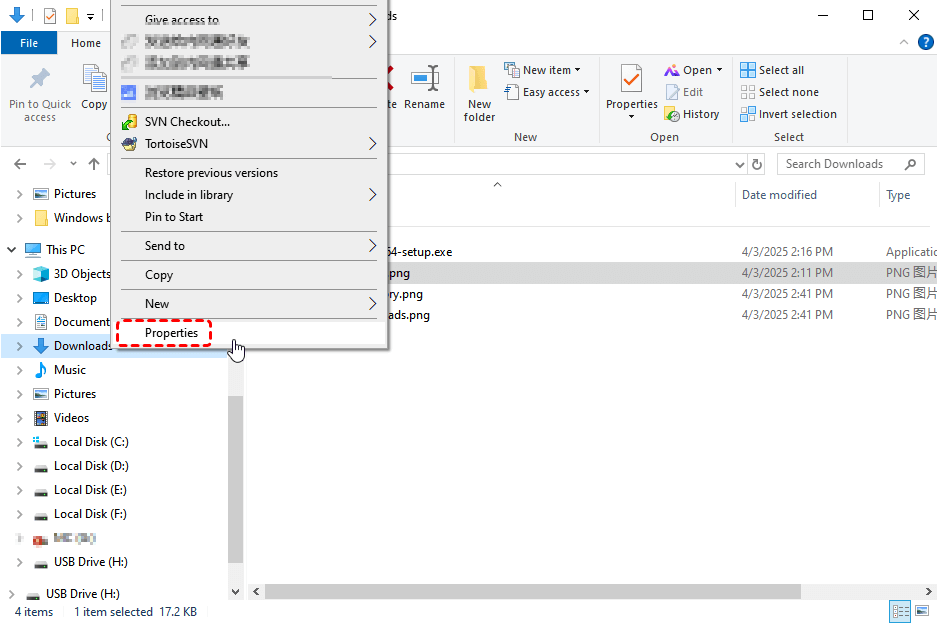
Step 2: Access Previous Versions: Once you've opened the correct folder, right-click on any blank area within the folder window (avoid clicking on existing files). From the context menu that appears, select "Properties".
Step 3: Browse and Select Backup Version: In the "Previous Versions" tab, you'll see a list of dated backups. Each entry represents how the folder appeared at that specific point in time. Scroll through these versions and look for one that predates your file deletion.
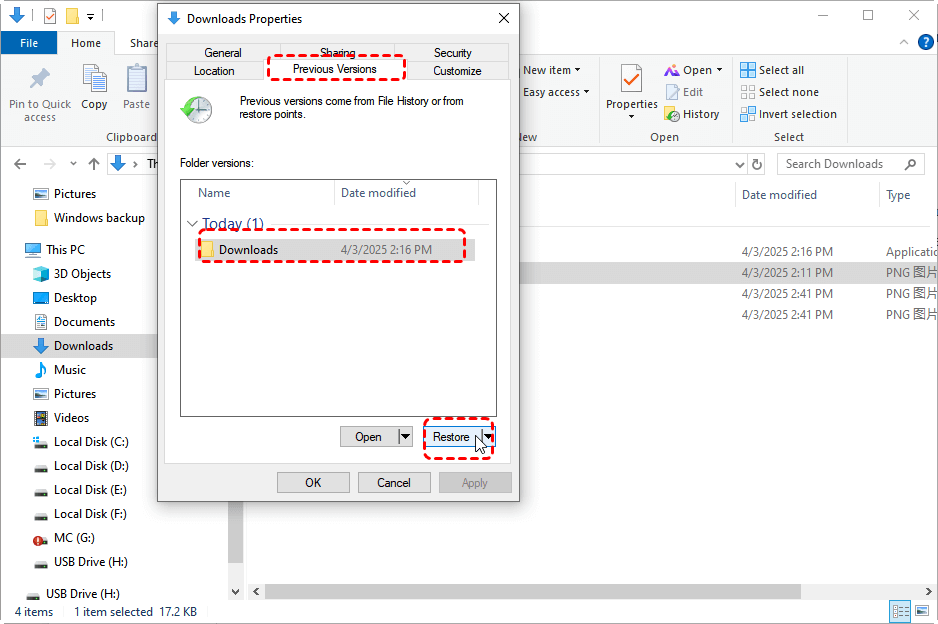
Step 4: Restore Your File: After locating the version containing your deleted file, click the "Restore" button to return the file to its original folder. Or click the drop-down arrow next to "Restore" and select "Restore to..." to choose a different destination folder.
Method 3. Check Cloud Backup Services
If your deleted file was synced to a cloud storage service like OneDrive, Google Drive, or Dropbox, you may be able to restore it from the cloud's version history or recycle bin. While the data recovery process varies slightly across different cloud storage services, the general approach is quite similar. Below, we'll use OneDrive as an example to demonstrate how to restore deleted files from specific folder.
Note: OneDrive automatically keeps deleted files for 30 days (or longer if you have a Personal Vault or business account).
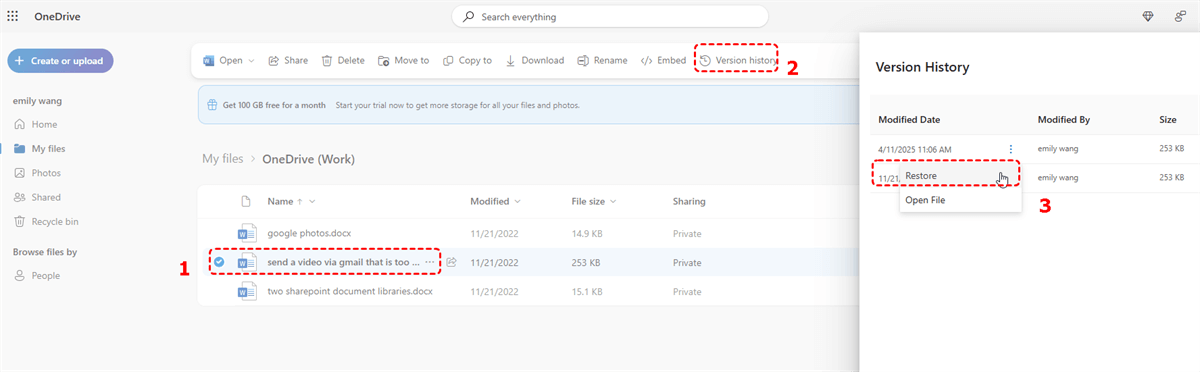
Step 1. Go to OneDrive Website and sign in.
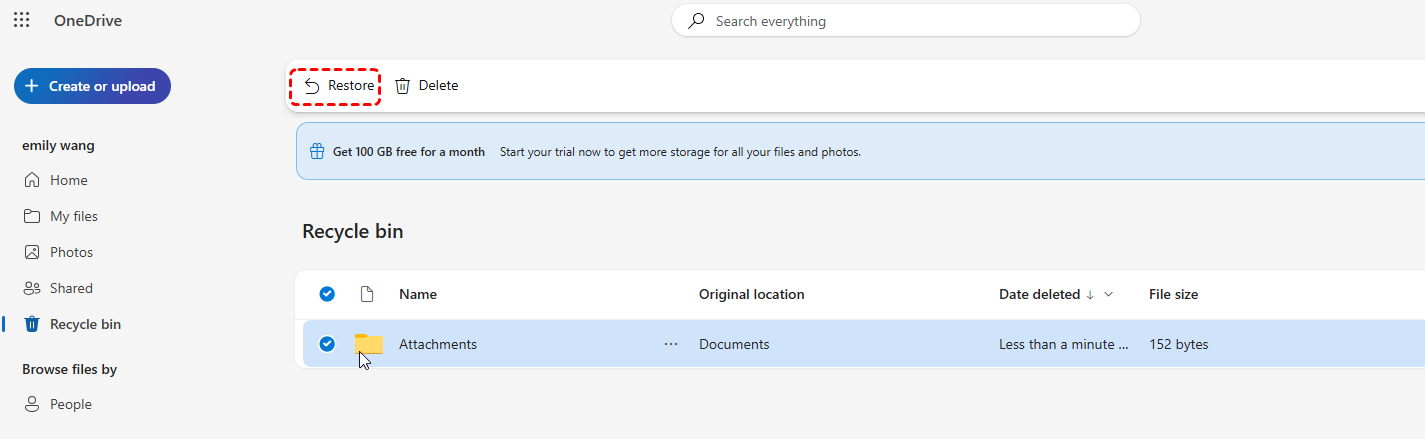
Step 2. Click "Recycle Bin" in the left sidebar.
If the file is there, select it and click "Restore" to recover it.
If the file isn’t in the Recycle Bin, check Version History: Right-click the file (or its parent folder) and select "Version History". Select a previous version and click "Restore".
Method 4. Try Microsoft File Recovery Software
When you fail to recover deleted files from a specific folder in Windows 10 because the file bypassed the Recycle Bin or no File History / cloud backups existed, Microsoft Windows File Recovery emerges as the most reliable solution. As Microsoft's official command-line tool, it performs quick scans for recent deletions and deep scans for formatted or corrupted drives.
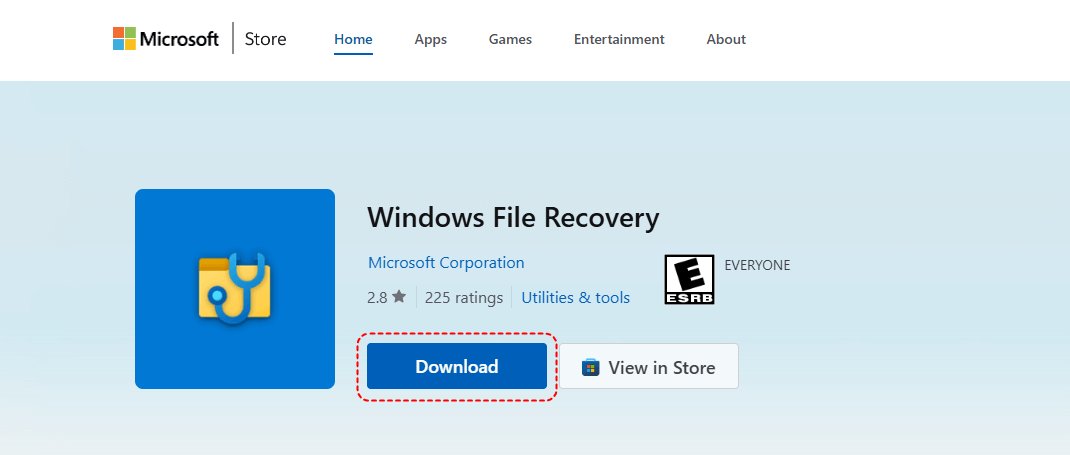
Step 1. Download and install: Open the Microsoft Store on your Windows 10/11 computer. Search for "Windows File Recovery" and click "Download". Then run the installer to complete the installation.
Step 2. Launch the Command Prompt tool– Once installed, press Windows key + S and type "Command Prompt". Right-click on Command Prompt and select "Run as administrator"

Step 3. Run the command: In the command window, type “winfr C: D: /regular /n \Users\username\Downloads\*.xlsx" (as an example) and press Enter to scan theDownloads folder in C: for deleted excelfiles and save them to D:

Method 5. Apply Third-party Data Recovery Software
If the file is not in the Recycle Bin, File History, or cloud backupsand Windows File Recovery also fails to recover deleted items from a folder, your next best option is to use professional data recovery software. While there are many tools available, we recommend MyRecover for its high success rate, user-friendly interface, and deep scanning capabilities.
✅ High Recovery Rate – Retrieves lost files after accidental deletion, formatting,virus attackor system crashes.
✅ Work on Countless Devices- Recover data from HDD, SSD, USB, SD card, camera as you need.
✅ Supports Multiple File Systems – Works with NTFS, FAT32 and exFAT drives.
✅ Easy to Use – No technical expertise required (unlike command-line tools).
✅ Preview Before Recovery – Lets you check files before restoring them.
✅ Safe & Secure – No risk of overwriting original data during scanning.
Step-by-Step to Recover Deleted Files from A Specific Folder
Step 1: Download and Install
Get MyRecover from its official website to ensure safety. Install it on a separate drive from where files were lost to prevent overwriting data. The setup is quick and requires minimal configuration.
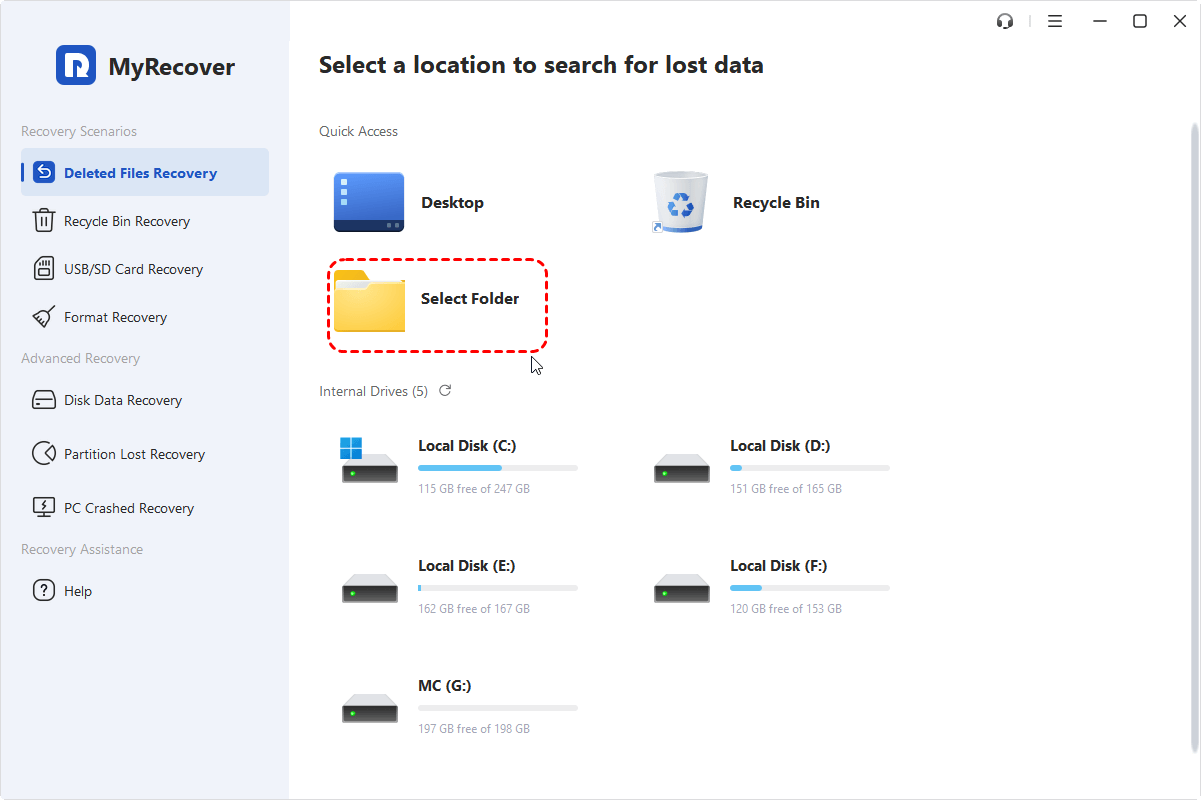
Step 2: Select and Scan
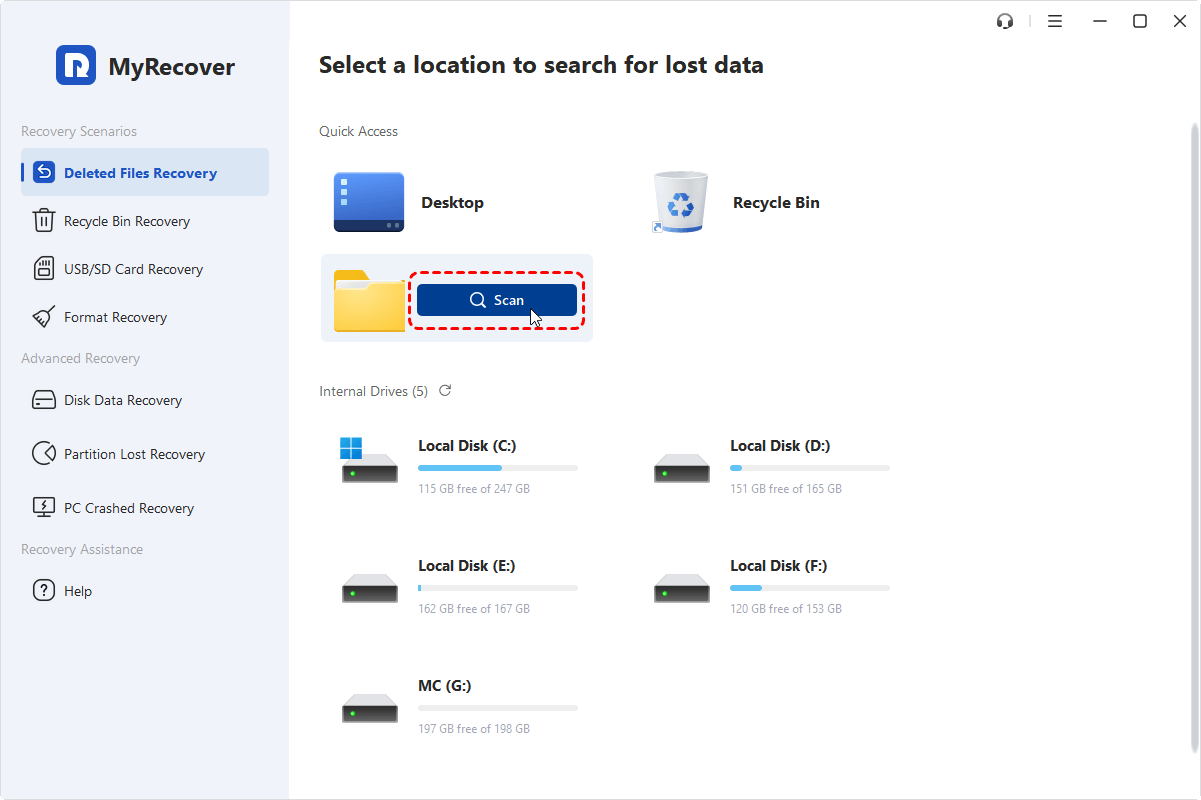
Launch the software and click on “Select Folder" in the right “Quick Access" section. Click on "Scan" button. Then you will need to choose a specific folder in the new pop-out window.
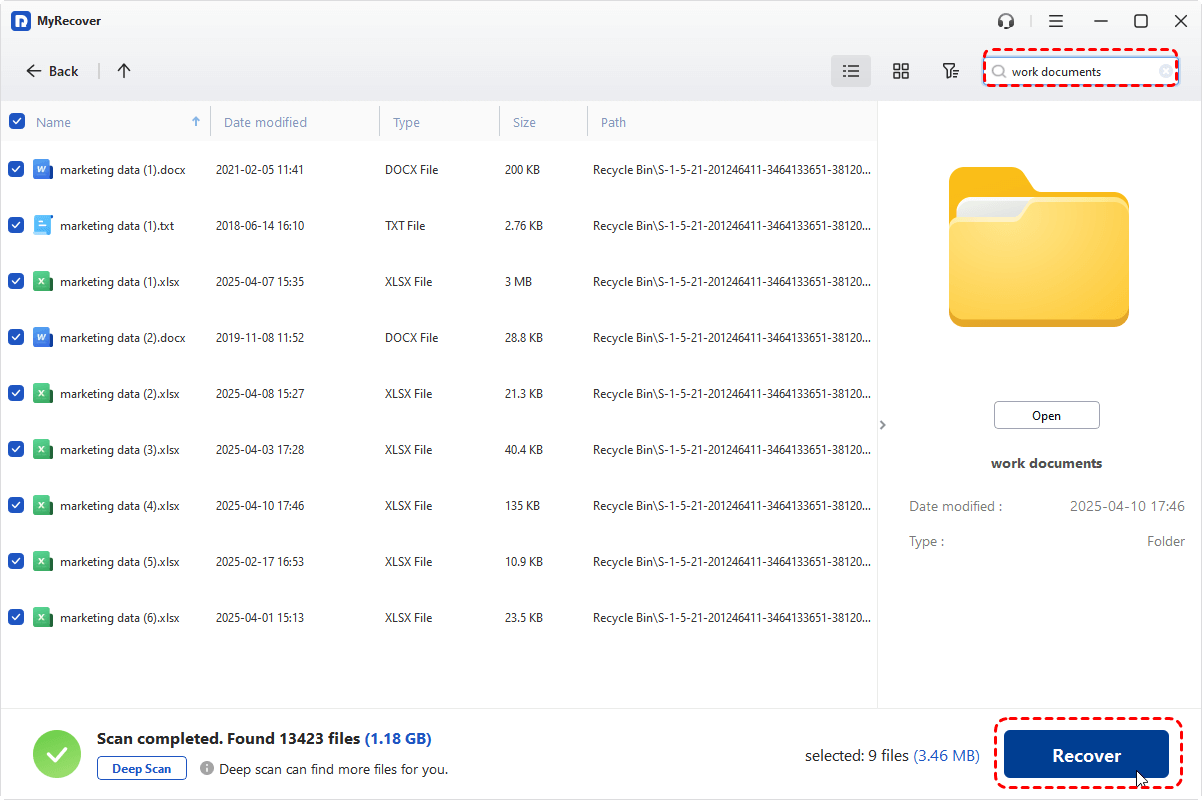
Step 3: Choose Scan Mode
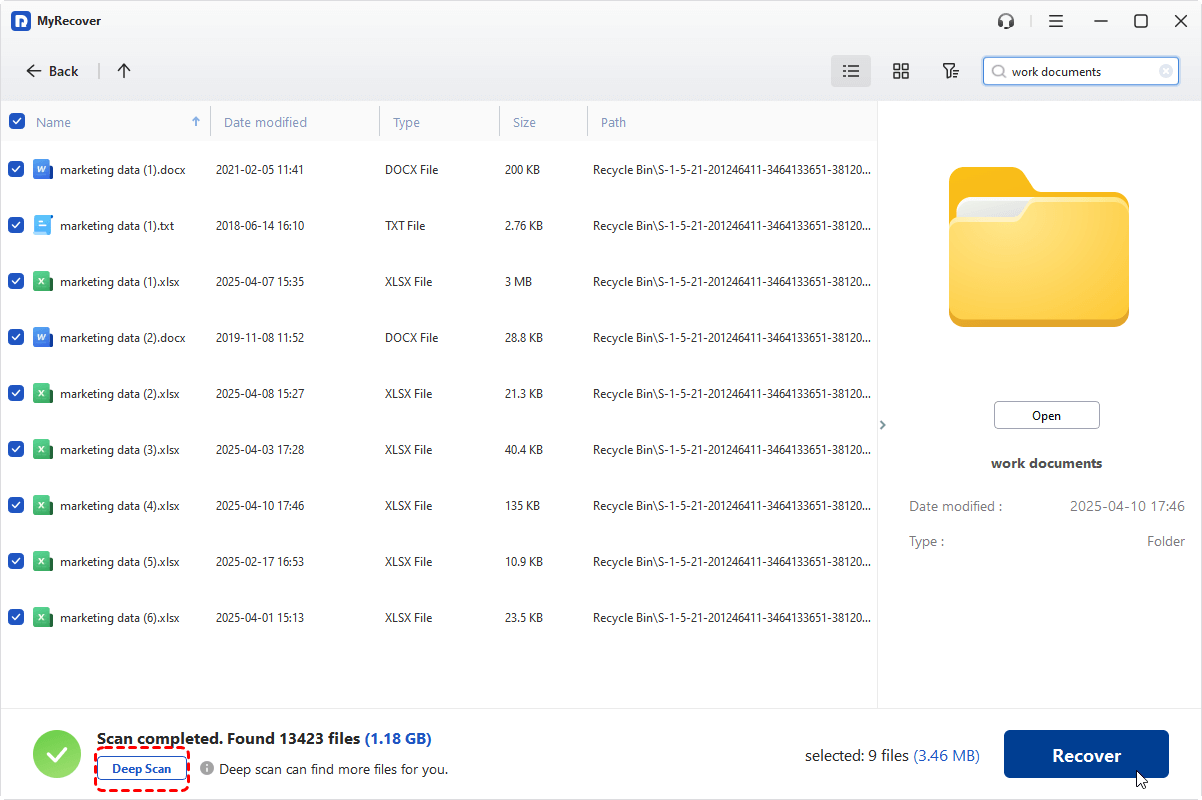
Then you select the specific folder, the software will scan the entire drive which the folder locates using "Quick Scan". If necessary, you can switch to "Deep Scan", which is slower but finds more files.
Step 4: Select and Preview
Browse or search scan results for missing files. You can type the specific folder name to quickly locate missing files inside. Preview recoverable items like photos or documents before restoring.
Step 5: Recover to a Safe Location
When you target the deleted files from the specific folder, click on "Recover" and choosea different folder to save the recovered files.
Then wait for the process to completed. Once done, you will see the message, "xxx files have been recovered successfully" along with the new path, which you can click on to directly access the recovered data.
Summary
So, how to recover deleted files from a specific folder in Windows computer? You have multiple recovery options - from checking the Recycle Bin to using File History or cloud backups. However, for the most reliable and comprehensive recovery solution, MyRecover stands out as the superior choice.
It combines powerful recovery technology with remarkable ease of use, capable of restoring files that other tools can't detect. Unlike basic methods, it successfully recovers permanently deleted items while maintaining their original folder structure - all through an intuitive interface designed for everyday users. If you want to use the software on unlimited devices, please try its Technician edition.

