
How to Recover Deleted or Lost Files Using CMD | Command Prompt File Recovery
Want to recover deleted or permanently lost files using CMD? This guide covers multiple methods, including the ATTRIB command to restore hidden files and Windows File Recovery for advanced data recovery. Follow step-by-step instructions to retrieve lost data from your PC, external drives, and flash storage devices.
By Emma / Updated on March 7, 2025
Overview of Recovering Deleted Files Using Command Prompt (CMD)
Command Prompt (CMD) is a powerful tool in Windows that allows users to perform various system operations, including “file recovery”. When files are deleted, they are not immediately erased from the storage device. Instead, the space they occupied is marked as available for new data. CMD provides built-in commands that can help recover lost or hidden files before they are overwritten.
When CMD Recovery Methods Are Useful
CMD recovery methods are particularly useful in the following scenarios:
1. Restoring Deleted Files from Recycle Bin: If files were deleted but not permanently removed from Recycle Bin, CMD can help locate and restore them.
2. Recovering Hidden or Missing Files: If files have been hidden due to system errors or malware, CMD can reveal them using the “ATTRIB command”.
3. Recovering Lost Files from Corrupted Drives: The CHKDSK command can repair drive errors and restore lost files from a damaged file system.
4.Using Windows File Recovery for Deep Scans: Windows provides an official tool, “Windows File Recovery”, which can be run through CMD to retrieve permanently deleted files.
How to Recover Deleted Files with CMD?
In this section, we will explore how to recover deleted files with Command Prompt in different situation. Take a look at and choose what suits your requirements.
👨🏫Preparation: run Command Prompt as Administrator
- Press “Win + R”, type “cmd”, and press “Ctrl + Shift + Enter” to run it as administrator.
- Search “cmd”in the start menu, right-click Command Prompt form the results and choose “Run as Administrator.”

- Press Windows key + X and select Command Promptor Windows PowerShell(Admin).
Method 1. Use DIR Command
If a file has been deleted but remains in the Recycle Bin, you can restore it using Command Prompt (CMD) by entering the following commands one at a time, pressing “Enter” after each:
1. cd $Recycle.Bin: This command takes you to the system folder where deleted files are stored.
2. dir /s: This will list all files currently stored in the Recycle Bin.
3. move "C:\$Recycle.Bin\S-1-5-21-XXXX\deletedfile.txt" "C:\Users\YourName\Desktop: Restore a specific file to a chosen location.
Replace“S-1-5-21-XXXX” with the actual user-specific folder name.
Method 2. Use ATTRIB Command
The ATTRIB command in Command Prompt (CMD) is used to modify file attributes in Windows. It is particularly useful for recovering hidden or inaccessible files caused by malware, system errors, or accidental changes.Just run the following command (replace E: with your drive letter).
attrib -h -r -s /s /d E:\*.*
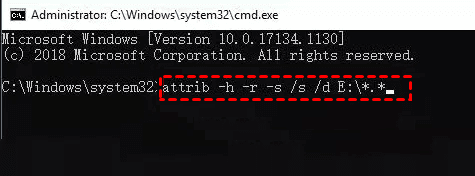
This removes Hidden (-h), System (-s), and Read-only (-r) attributes from all files on E: drive, making them visible again.
- -h: remove Hidden attribute
- -r: remove Read-only attribute
- -s: remove System attribute
- /s: Apply changes to all files in subdirectories
- /d: Include directories
Method 3. Use CHKDSK Command
The “CHKDSK (Check Disk)”command in Command Prompt is used to scan, detect, and repair disk errors on hard drives, SSDs, USB flash drives, SD cards, and other storage devices. It helps fix file system corruption, recover readable data from bad sectors, and improve overall disk health.
Key Functions of CHKDSK Command:
1. Detect and Fix File System Errors: Repairs issues in NTFS and FAT file systems.
2. Locate and Recover Data from Bad Sectors: Marks faulty disk areas to prevent further data loss.
3.Improve System Performance: Optimizes storage and prevents crashes caused by disk errors.
4.Restore Lost Files from Corrupt Drives: Can help recover inaccessible files due to logical disk failures.
To recover deleted files using chkdsk cmd, run the command: chkdsk g: /f /r (Replace “g:”with your actual drive letter.)
- /f: Fixes detected file system errors.
- /r: Scans and recovers readable data from bad sectors.

Method 4. UseWinfr Command(For Permanently Deleted Files)
The winfr command is part of the Windows File Recovery tool, which is a built-in application in Windows 10 and later versions. It helps recover deleted files from local drives, external drives, or even USB flash drives and SD cards, making it particularly useful when files are lost due to accidental deletion or after formattingand you cannot restore them from Recycle Bin, either.
To recover deleted files using winfr command, just execute the command (example):
winfr C: D: /n \Users\YourName\Documents\*.xlsx
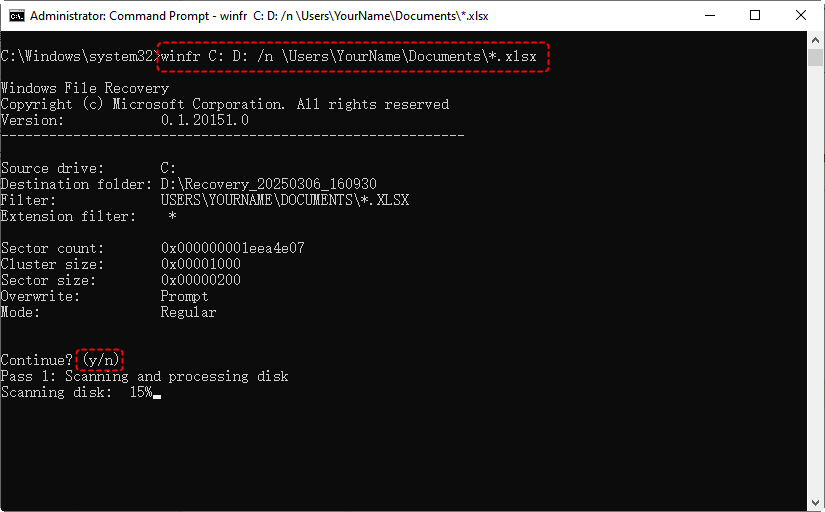
This will recover deleted Excel files (*.xlsx) from the C: drive and save them to the D: drive.
Basic Syntax of Winfr Command: winfr source-drive: destination-folder [/mode] [/switches]
- Parameters:
- source-drive: The drive where the deleted files were located.
- destination-folder: The folder where recovered files will be saved. Make sure this is on a different drive from the source to avoid overwriting data.
- destination-folder: The folder where recovered files will be saved. Make sure this is on a different drive from the source to avoid overwriting data.
- /mode: The scanning mode you want to use. There are two main modes: /normal– A standard scan to recover files that are not overwritten; /extensive– A deeper scan for files that may be partially overwritten, providing more thorough recovery chances.
- /switches: Additional options to fine-tune your search. For example, you can use /n to filter by specific file types or file paths.
For example:
winfr C: D: /normal: recover deleted files from C: drive and save them to D: drive
winfr C: D: /extensive: a deeper scan to recover more difficult-to-find files
winfr C: D: /n \Users\YourName\Documents\*.xlsx: recover only Excel files located in the Documents folder:
How to Recover Deleted Files Using Command Prompt Alternative?
While Command Prompt methods, such as using “CHKDSK”, “ATTRIB”, and “Winfr”, can be helpful for recovering deleted files in certain situations, they do have their limitations. These methods work best when files are simply hidden, corrupted, or recently deleted, but if the files have beenoverwritten orpermanently erased, recovery chances diminish significantly.
In such cases, third-party recovery software like “MyRecover” provides a more powerful and reliable solution. MyRecover offers advanced scanning capabilities that can recover files from damaged, formatted, or deeply corrupted drives, giving you a higher chance of success compared to using Command Prompt alone.
- 🌟🌟🌟Highlights:
- 🌟User-Friendly Interface: MyRecover has an intuitive, easy-to-navigate interface for both beginners and experts.
- 🌟Comprehensive File Recovery: It recovers a wide range of file types, including documents, images, and videos.
- 🌟Deep Scanning for Better Results: The Deep Scan feature allows for thorough recovery of deeply lost or overwritten files.
- 🌟Supports Various Storage Devices: MyRecover works with all storage devices, including external hard drives, USBs, and SD cards.
- 🌟Preview Recovered Files: You can preview files before recovery to ensure they are intact and usable.
- 🌟Comprehensive File System Support: It supports multiple file systems like NTFS, FAT, and exFAT for broader recovery.
- 🌟All-inclusive Data Loss Situation: MyRecover helps you recover data from various loss scenarios, including accidental deletion, formatting, system crashes, virus attack, and more.
Steps to Recover Deleted Files by MyRecover
1. Download and Install MyRecover : Visit the official website to download MyRecover and install it on a different drive from the one you want to recover files from.
2. Launch MyRecover: Open the software with administrator privileges to ensure it can scan your drive properly.
3. Select the Target Drive: Choose the drive or partition from which you want to recover deleted files and click "Scan" to begin the process.

4. Choose Quick or Deep Scan: Start with a “Quick Scan”to find recently deleted files. If necessary, proceed with a “Deep Scan”for a more thorough search of lost data.
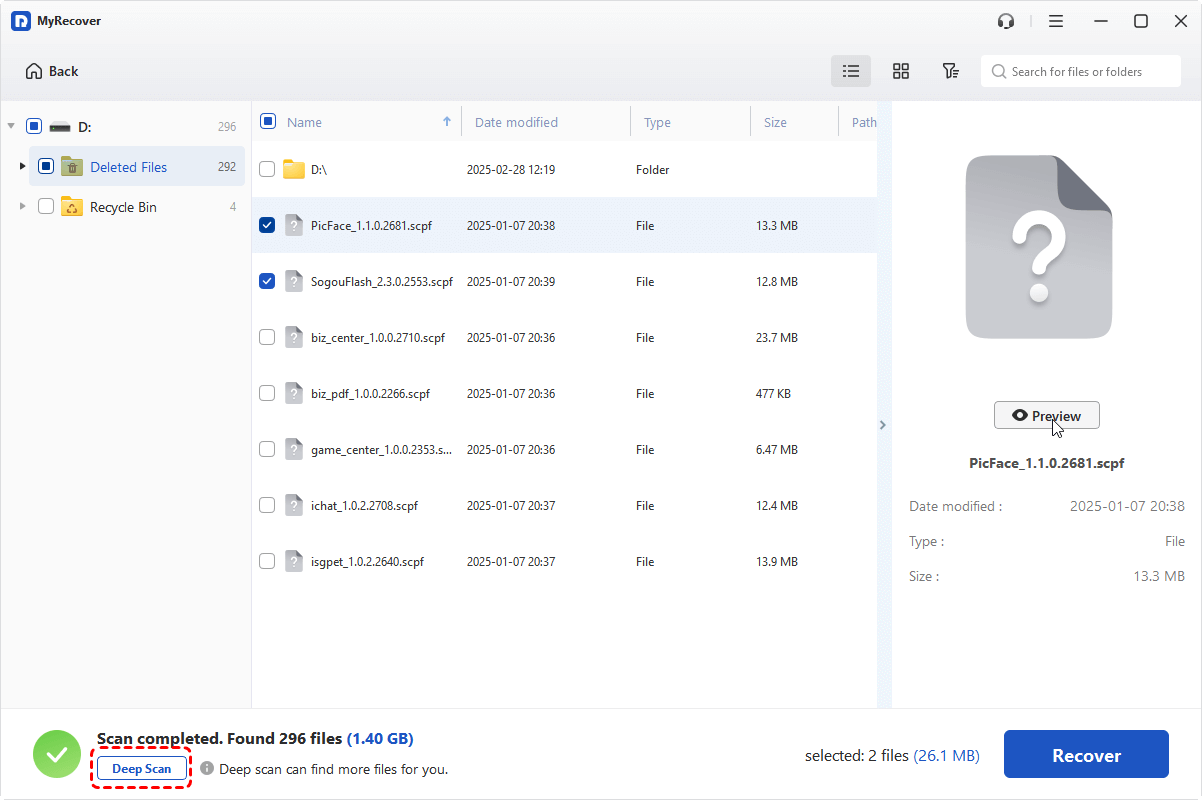
5. Preview Recoverable Files: Once the scan is complete, browse through the list of recoverable files. Use the “preview”feature to verify the integrity of the files.
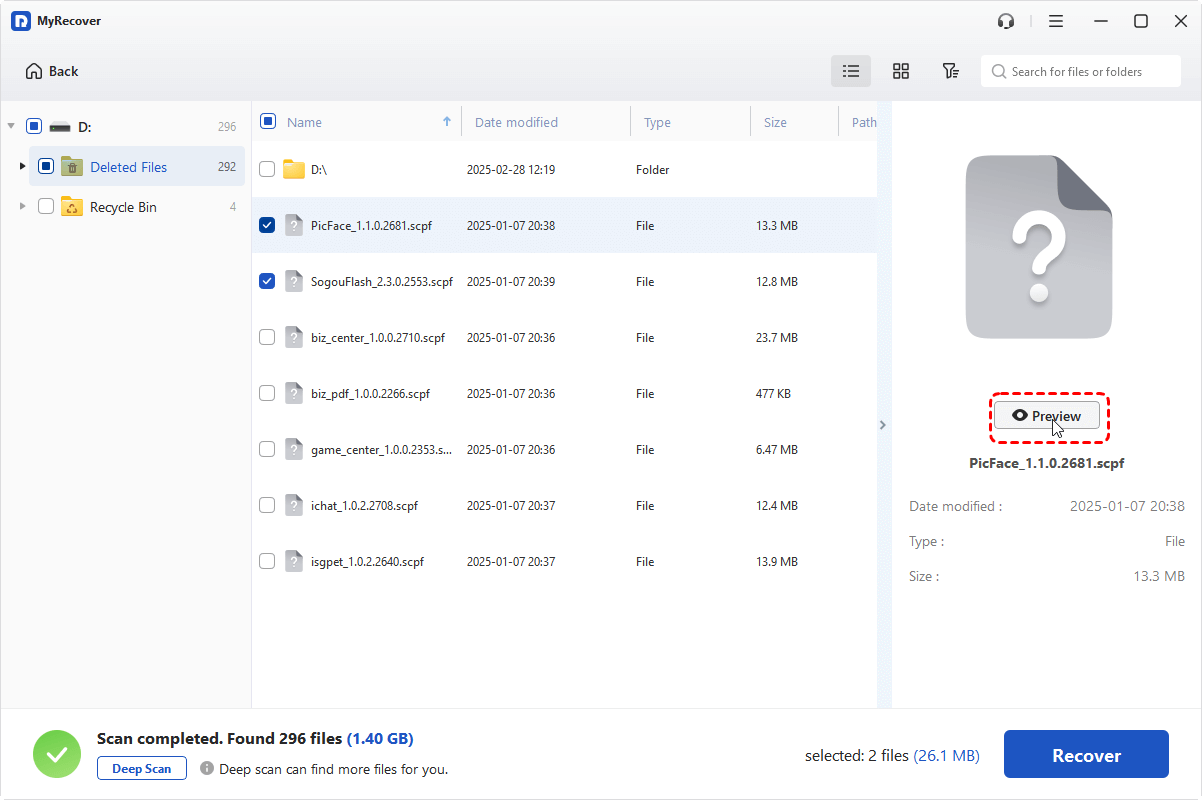
6. Select and Recover Files: Choose the files you want to recover and click "Recover." Save them to a different location to prevent overwriting any remaining lost data.


Summing Up
Recovering deleted files using CMD (Command Prompt) offers several useful methods for different scenarios, including restoring files from the Recycle Bin, recovering hidden files with the ATTRIB command, repairing corrupted drives with CHKDSK, and retrieving permanently deleted files using the Winfr command.
While these CMD methods can be helpful in many cases, they have limitations. For more advanced file recovery, third-party software like MyRecover offers a comprehensive solution with powerful scanning capabilities and an easy-to-use interface. Besides, it comes with 3 different editions, 1 free version and 2 paid versions for you to select. If you want to preview all recoverable files and recover data from crashed computer, please go for Professional or Technician edition.

