
How to Use Windows File Recovery Command Prompt [Windows 11 / 10]
Windows File Recovery is a powerful tool from Microsoft that helps users recover deleted files on Windows 10 and Windows 11. This guide provides step-by-step instructions on using Windows File Recovery, including recovering files from USB drives. Whether you're a beginner or an experienced user, this tutorial will help you easily restore lost data!
By Emma / Updated on April 8, 2025
Overview of Windows File Recovery

Windows File Recovery is a command-line tool developed by Microsoft to help users recover deleted files from local storage devices, including internal, external drives and USB devices. It is available for Windows 10 (version 2004 and later) and Windows 11. This tool supports different recovery modes depending on the file system and data loss scenario, making it a powerful option for retrieving lost files.
Key Features:
- Supports recovery from HDD, SSD (excluding TRIM-enabled SSDs), USB drives, and memory cards.
- Works with NTFS, FAT, exFAT, and ReFS file systems.
- Offers different recovery modes: Regular, Extensive, Segment, and Signature.
How to Use Windows File Recovery App and Command Prompt
Unlike traditional file recovery software with a graphical interface, Windows File Recovery operates through Command Prompt (CMD), offering multiple recovery modes for different file systems and data loss scenarios.
Whether you've accidentally deleted files, formatted a drive, or lost data due to corruption, this guide will walk you through how to install, use, and recover files using Windows File Recovery.
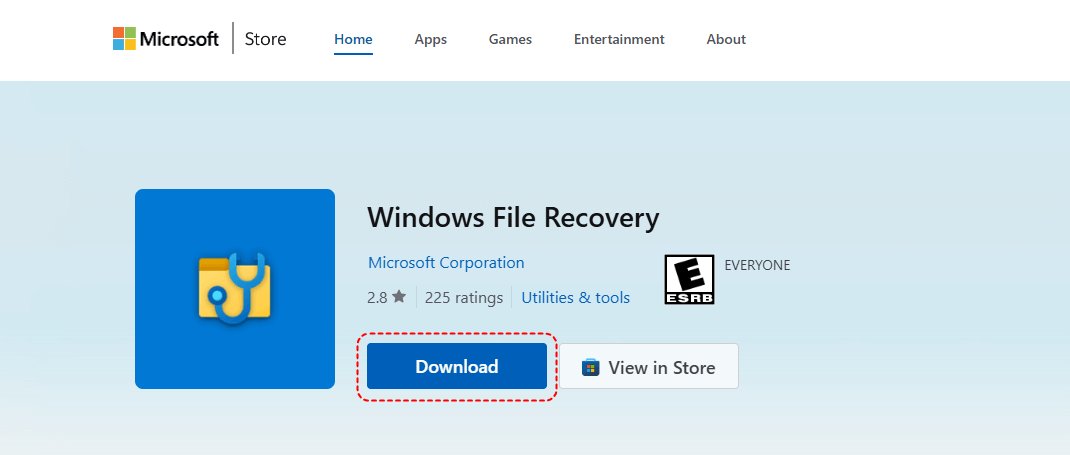
Step 1. Install Windows File Recovery APP
First of all, you have to download and install Windows File Recovery APP.
- Open Microsoft Store.
- Search for Windows File Recovery.
- Click Install and wait for the installation to complete.
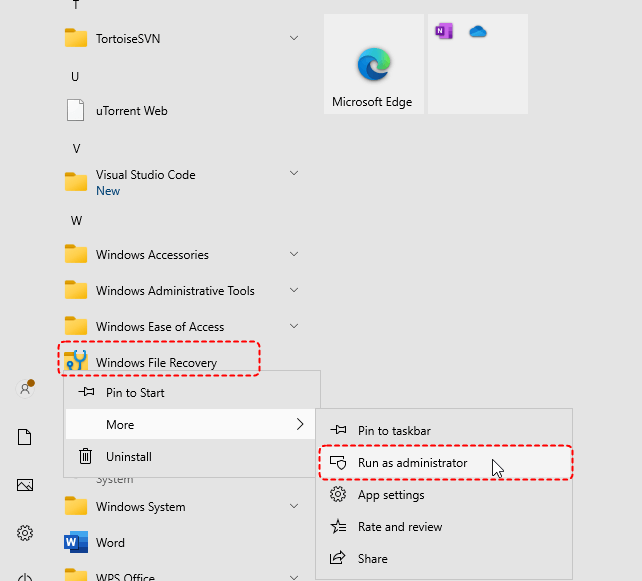
Step 2. Launch Windows File Recovery Command Prompt
Since Windows File Recovery is a command-line tool, you need to run it through Command Prompt (CMD) with administrator privileges. Just right-click the Windows File Recovery in the Start menu and choose “Run as administrator.”Then the Windows File Recovery Command Prompt will pop out.
Alternatively, you can first open the Command Prompt window and run the wfr command as following:
- Press Win + S and type Command Prompt or cmd.
- Right-click on Command Prompt and select Run as administrator.

- If prompted by User Account Control (UAC), click Yes to allow access.
Step 3. Type and Run Commands in Windows File Recovery CMD Window
Once you have launched Windows File Recovery in Command Prompt, you can start recovering deleted files using different commands and recovery modes based on your situation.
✔️Understand the Basic Command Structure
The general syntax for Windows File Recovery commands is:
winfr source-drive: destination-folder [/mode] [/switches]
Source-drive: The drive where the deleted files were originally stored.
Destination-folder: The folder where recovered files will be saved (must be on a different drive).
/mode: The recovery mode to use (Regular, Extensive, Segment, or Signature).
/switches: Additional options to refine the search, such as file types or specific folders.
✔️Choose the Right Recovery Mode
Overview of the four different modes: Regular, Extensive, Segment, or Signature.
| Recovery Mode | Applies To | File System Support |
|---|---|---|
| Regular | Recently deleted files |
|
| Extensive | Formatted, corrupted, or older deleted files | NTFS, FAT, exFAT |
| Segment |
|
NTFS |
| Signature | Specific file types (e.g., JPEG, PDF, MP4) | NTFS, FAT, exFAT |
✔️Run a Windows File Recovery Command
Now, let's go through some common commands to help you quickly learn how to use Windows File Recovery CMD on Windows 10 and Windows 11.
- Note:✎...
- When prompted to continue after entering the command, simply press Y on your keyboard to proceed.
Example 1: Recover Recently Deleted Files (NTFS Drive)
winfr H: D:\test /regular
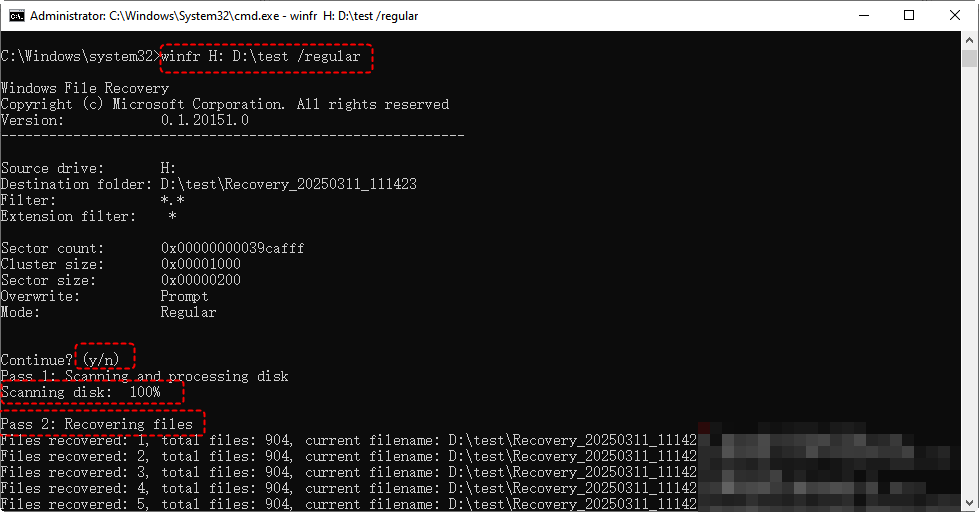
What it does: Recovers recently deleted files from H: drive and saves them to D:\test folder.
Example 2: Recover Files from a Formatted or Corrupted Drive
winfr H: D:\test /extensive
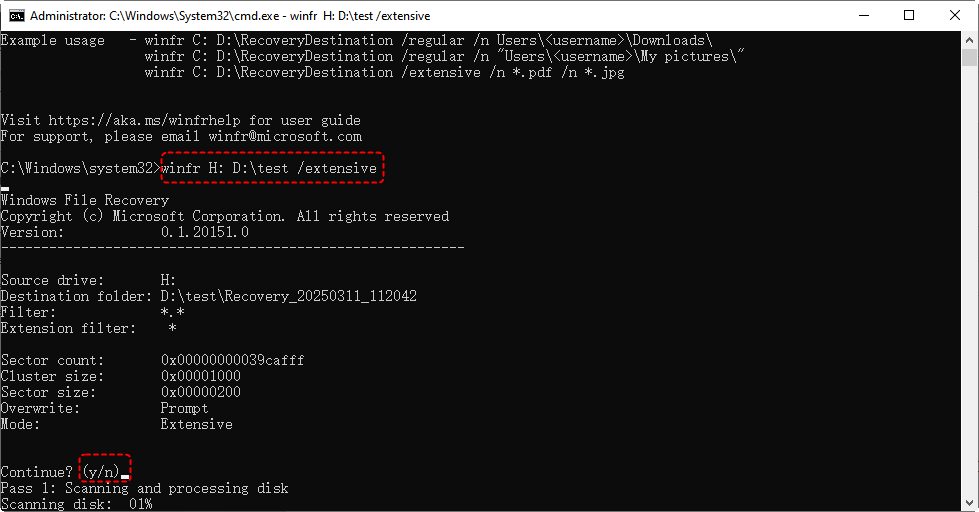
What it does: Performs a deep scan on the H: drive for lost files and saves the recovered files to the D:\test folder. A deeper scan will take a longer time.
Example 3: Recover Specific File Types (TXT, EXCEL, PDF, DOCX, JPG, etc)
winfr H: D:\test /extensive /n *.txt
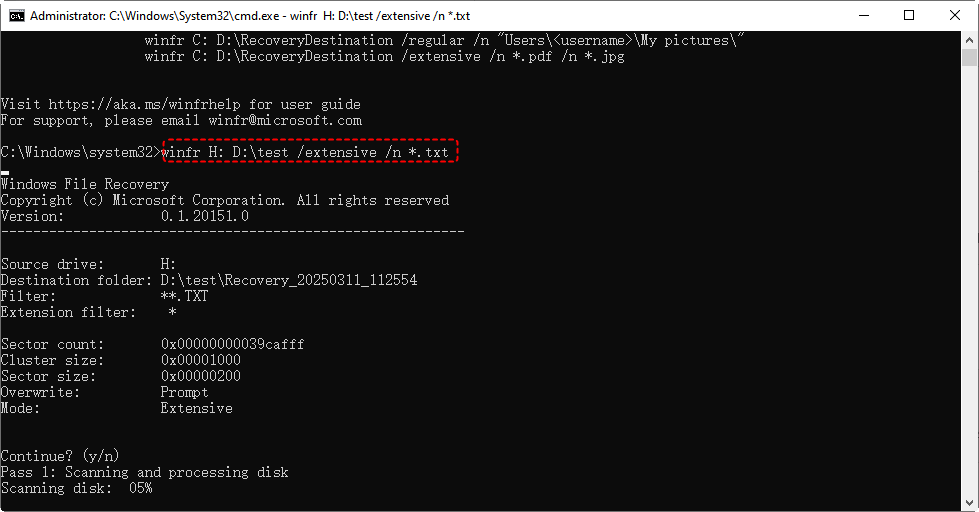
What it does: Performs a deep scan on the H: drive for lost txt files and saves the recovered files to the D:\test folder.
Example 4: Recover a Specific Folder
winfr H: D:\test /regular/n /ImportantFolder
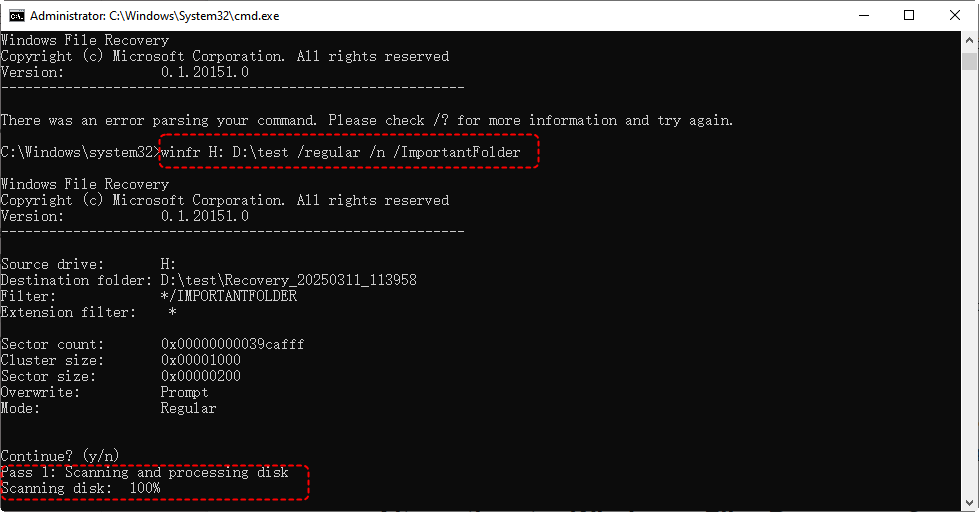
What it does: Performs a quick scan on the H: drive for “Important”folder and saves the recovered files to the D:\test folder.
Once the process is complete, open D:\Test folder (or your chosen destination) to view the restored files. Now, you can successfully recover deleted files using Windows File Recovery and Command Prompt!
Alternative to Windows File Recovery Command Prompt: Easily Recover Lost Data
While “Windows File Recovery (WinFR)”is a powerful tool for recovering deleted files, from the above guide on how to use Windows File Recover, we can easily conclude that it comes with several limitations:
😑Command-Line Interface: WinFR lacks a graphical user interface (GUI), making it difficult for non-technical users.
😑Limited File Preview: You cannot preview files before recovering them, leading to uncertainty about file integrity.
😑No Support for TRIM-Enabled SSDs: If your SSD has TRIM enabled, file recovery is nearly impossible.
😑Complex Commands: Users need to remember specific command-line syntax, which can be challenging, especially for beginners.
If you’re looking for an easier and more efficient way to recover lost files, MyRecovery is a great alternative. Unlike WinFR, MyRecovery offers a user-friendly interface, one-click recovery, and advanced scanning algorithms to retrieve lost data effortlessly.
Key Benefits of MyRecovery:
🤩 Intuitive GUI: No need for complex commands—recover files with just a few clicks.
🤩Preview Before Recovery: View recoverable files before restoring them.
🤩 Supports SSDs & Various Storage Devices: Works with HDDs, SSDs, USB drives, SD cards, and more.
🤩 Faster & More Effective Scans: Deep and quick scanning modes to locate lost files efficiently.
🤩Recover Specific File Types: Easily filter and restore images, videos, documents, and more.
Easy Steps to Recover Data with MyRecover
Step 1. Visit the official website, download and install MyRecover on your PC.
Step 2. Open the application after installation. Choose the drive or folder where your lost data was located.
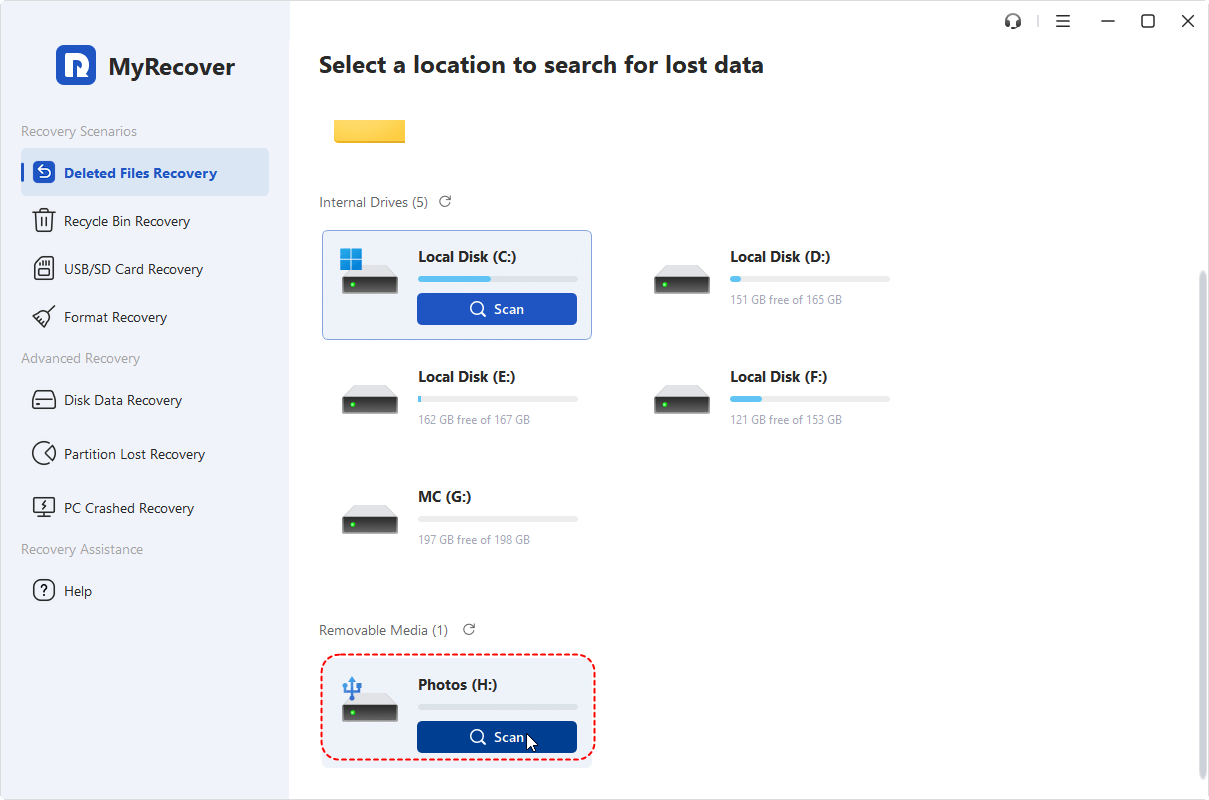
Step 3. Click Scan to begin the process. MyRecover will automatically search for deleted or lost files. If the quick scan does not find out your lost files, please turn to “Deep Scan”instead.
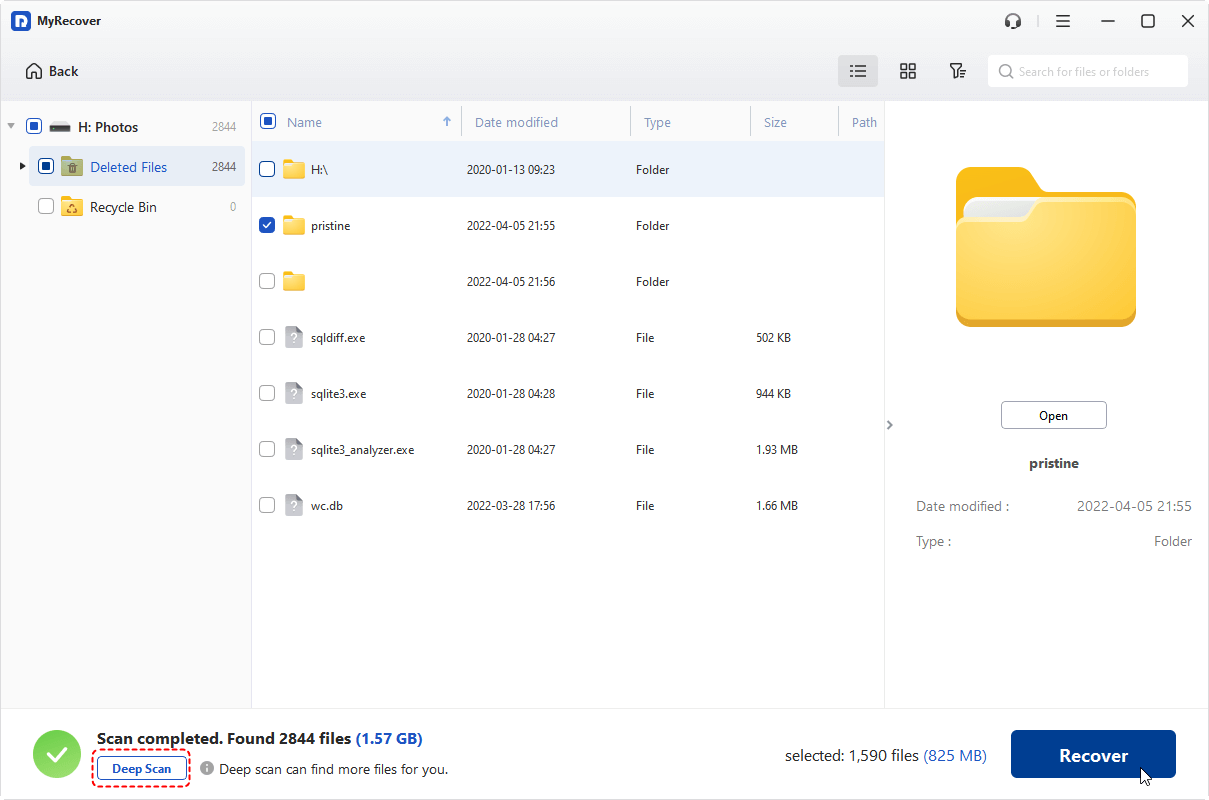
Step 4. Once the scan is complete, preview the recoverable files. Select the ones you wish to restore.
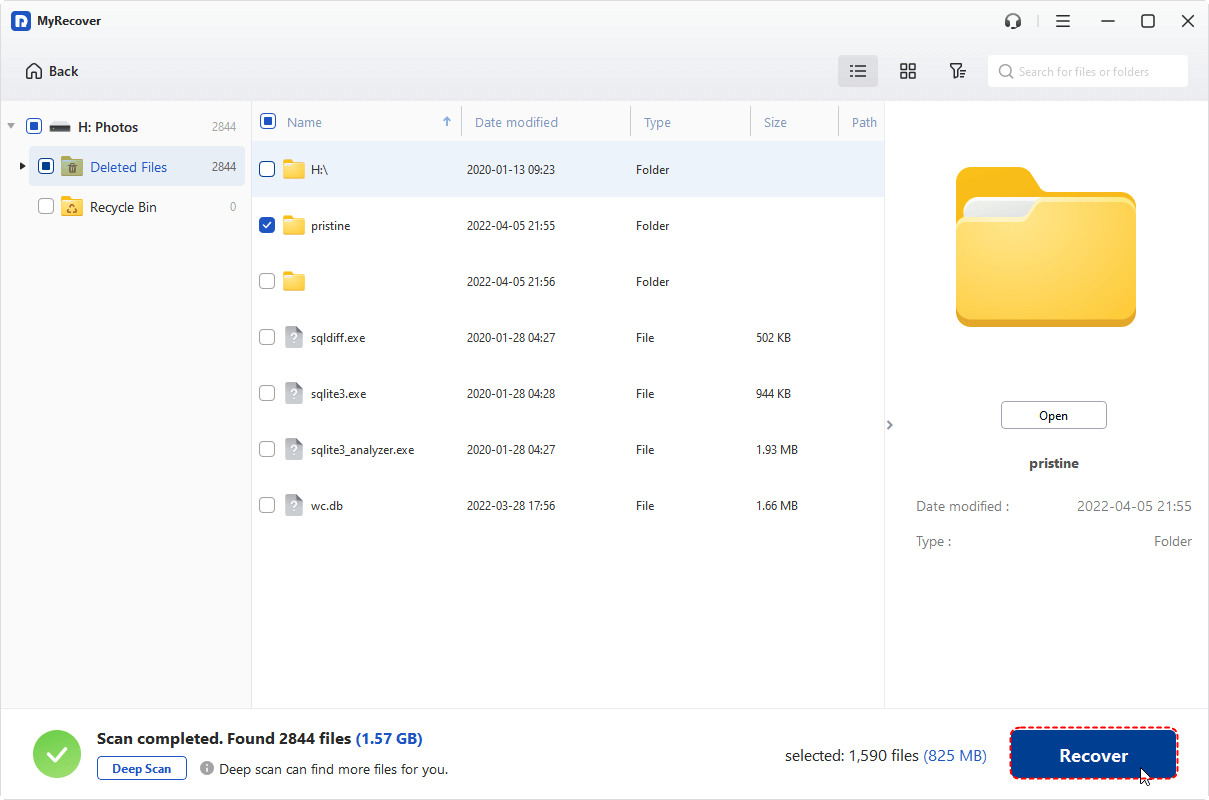
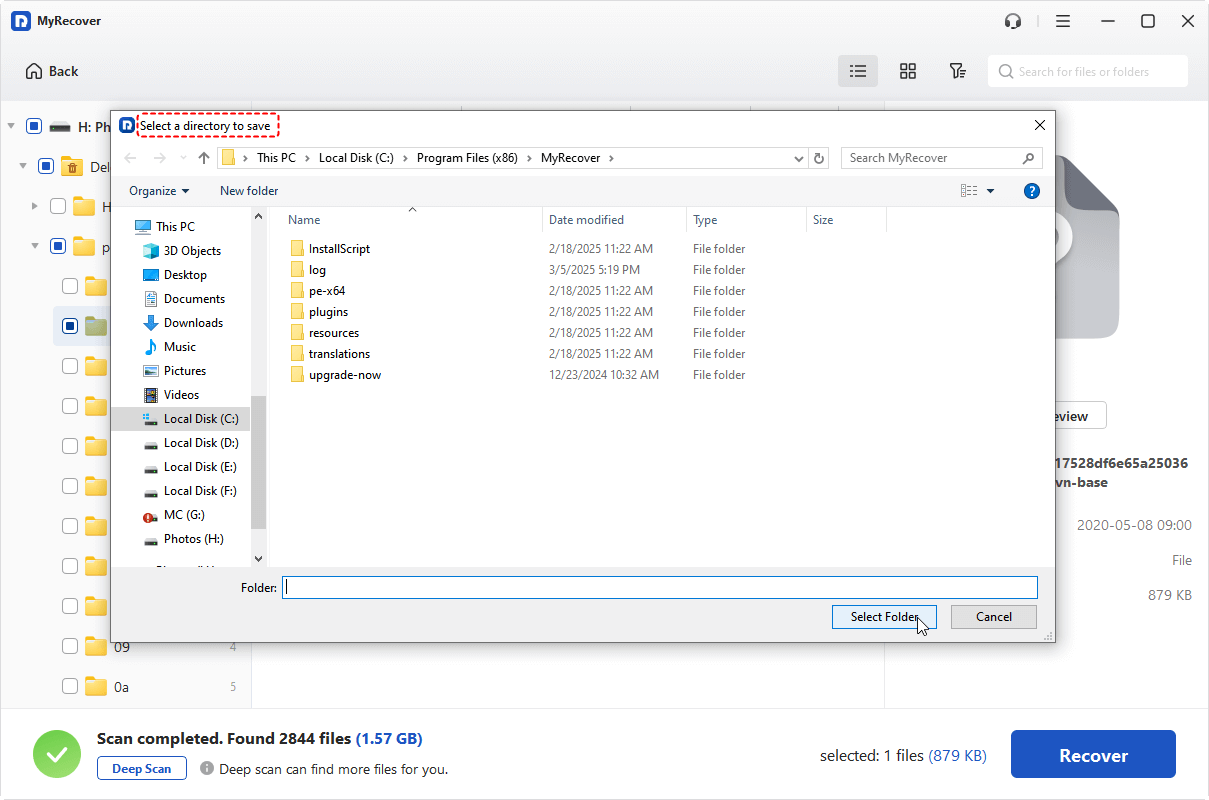
Step 5. Click Recover and choose a destination folder to save the files (ensure it's a different drive).
Conclusion
While Windows File Recovery is a useful built-in tool, its limitations make it less practical for everyday users. MyRecovery provides a more accessible, efficient, and user-friendly alternative for recovering lost files with ease. If you prefer a hassle-free data recovery solution, MyRecovery is the way to go! Its Professional or Technician edition even allows you to reover data from computers that won’t boot.

