
Solved: Recover Deleted Files SSD with TRIM-enabled in 3 Steps
Powerful data recovery software like MyRecover can help you recover deleted files from SSD with TRIM-enabled as it can thoroughly scan and retrieve data on it.
By Ivy / Updated on January 7, 2025
SSDs are popular storage devices nowadays, but most of them support TRIM. lt logically arranges data to simplify system operations, but due to its complexity, data recovery is more challenging. However, there is still a slight chance to make it possible. Read our guide to learn how.
Can You Recover Data from TRIM-enabled SSD?
Since SSD has a limited number of write and erase cycles per cell, the TRIM feature was created and it can notify the SSD of which blocks are unused and proactively erases deleted files instead of waiting for new data to overwrite them. Here are some affected factors:
| Factors | Description |
|---|---|
| ⏳Timing | Yeah, the SSD will mark unused data blocks for erasure as soon as you perform any “delete”operation. However, this may not happen immediately, especially if the disk is still writing data. As such, it is advisable to recover data from TRIM-enabled SSDs as soon as possible. |
| 💻Wear Leveling Algorithms | It distributes data evenly across the hard disk, so even if some blocks are erased, you can still relocate them. But this also makes data recovery complicated. |
| 💾SSD Size and Usage | SSDs with less space often overwrite data faster than larger drives. Don't heavily use the SSD drive after the “deletion” action as it greatly reduces the likelihood of recovery. |
⭐Part 1: Check If Your SSD Is TRIM-enabled
If you are not sure if the SSD is TRIM-enabled, follow the steps below to check the status:
Step 1. Type cmd in the search box and select Run as administrator.
Step 2. In the command prompt window, type the following command and press Enter to get the result.
fsutil behavior query disabledeletenotify
Step 3. Check the result. Please disable TRIM if the command DisableDeleteNotify = 0. It means the SSD is TRIM-enabled.
fsutil behavior set disabledeletenotify1

⭐Part 2: Recover Deleted Files from SSD with TRIM-enabled
As mentioned earlier, there is a chance to recover deleted files from SSD with TRIM-enabled in some situations. Using reliable data recovery software will significantly increase the success rate of data recovery.
MyRecover, with a new UI and interactive experience, breathtaking recovery capacities, more flexible recovery options, etc., can be a good choice for TRIM-enabled SSD drive data recovery.
❤❤❤ Why Choose MyRecover?
✔ It has a free version that can recover data up to 500MB.
✔ Intelligent use of Quick Scan and Deep Scan to scan hard drives and find as many files as possible in less time.
✔ Support a wide range of data types, such as documents (DOCX, XLSX, CSV, PDF, PPT) to images(JPG, PNG, GIF, PSD), videos(MP4, MOV, AVI, WMV, X3F),etc., in over 1000 data formats.
✔ Search or filter data quickly through file name, extension, data type, etc.
✔ Preview and recover files while scanning.
✔ Selectively restore files, not all of them.
✔ Recover data from specific locations (e.g. Recycle Bin), deleted or lost, formatted, RAW partition, or entire disk.
✔ Work perfectly with NTFS, FAT32, exFAT, ReFS file systems.
Now you need to navigate to the official website and click Try for Free to download and install MyRecover. Or click the download button below.
Step 1. Scan TRIM-enabled SSD
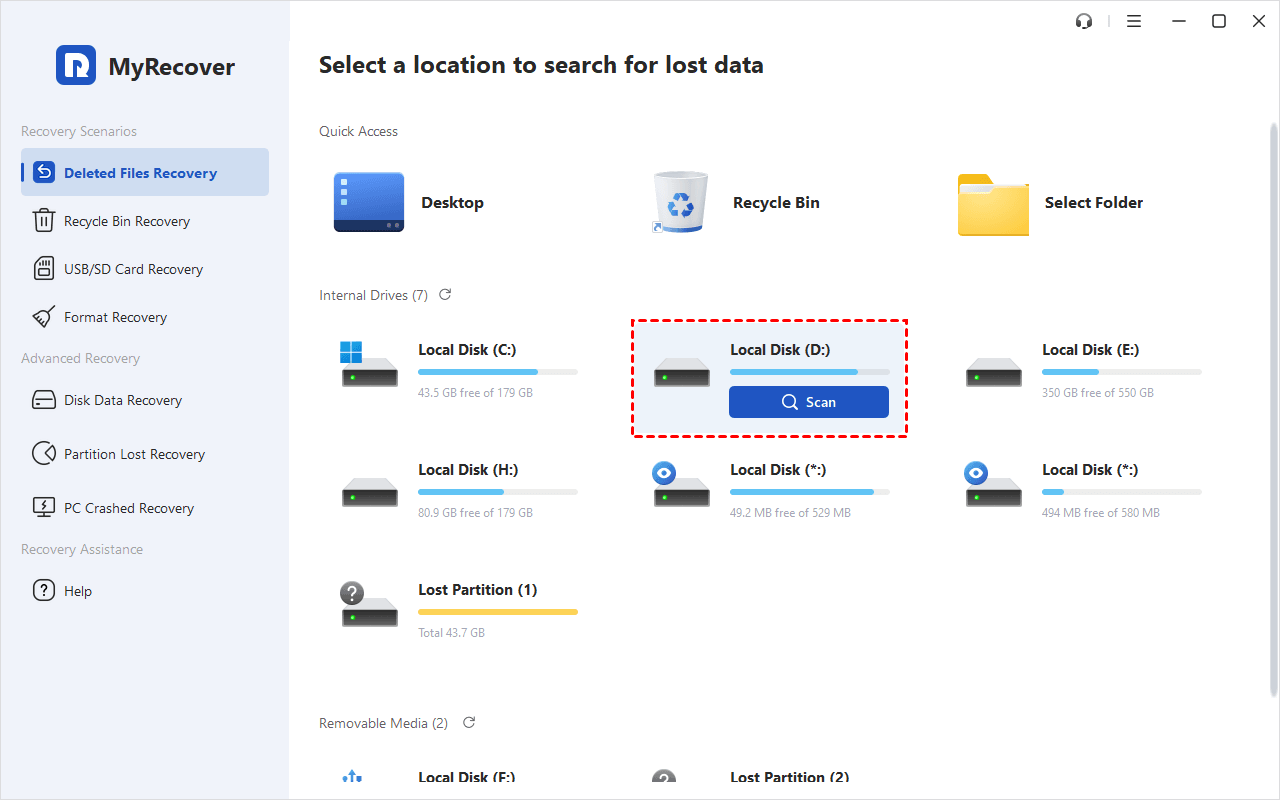
Launch this Windows data recovery software - MyRecover. You will see multiple options, as the name suggests, you can recover deleted files, files in the Recycle Bin, or data from USB/SD card, formatted or lost partition, entire disk, or even crashed system.
To scan and find deleted files from SSD with TRIM-enabled quickly, go to Deleted File Recovery. Then, hover the mouse over the SSD drive and click Scan. You can also select other options according to your situation.
Step 2. Search for Recoverable Data
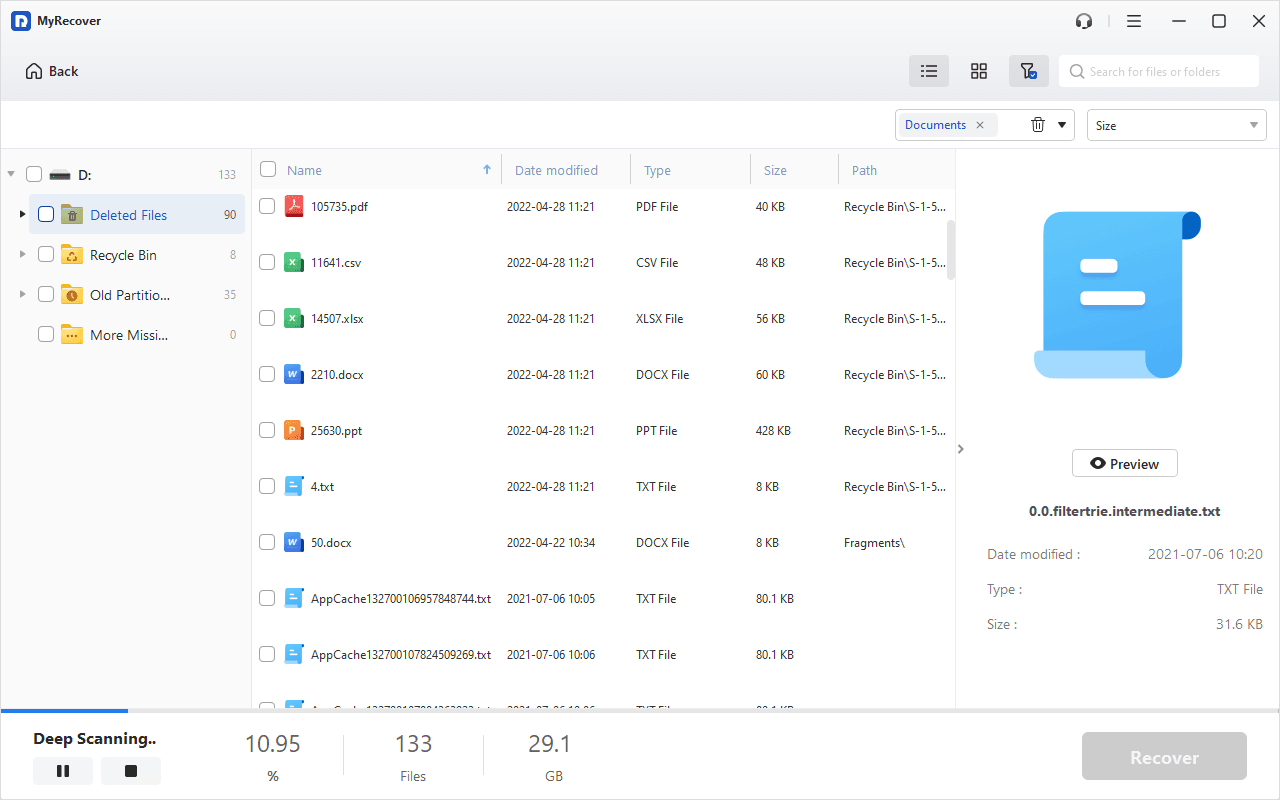
MyRecover can automatically scan the selected drive to find all recoverable files. You can use search & filter features to locate them quickly without waiting for the final result:
- click the funnel-shaped button to specify the data type (e.g. Documents, Images, Videos, etc) to target the filter range.
- If necessary, set the size, from less than 512KB to 1GB above.
- Then, type the file name or extension in the search box to narrow it down.
Step 3. Start TRIM-enabled SSD Data Recovery
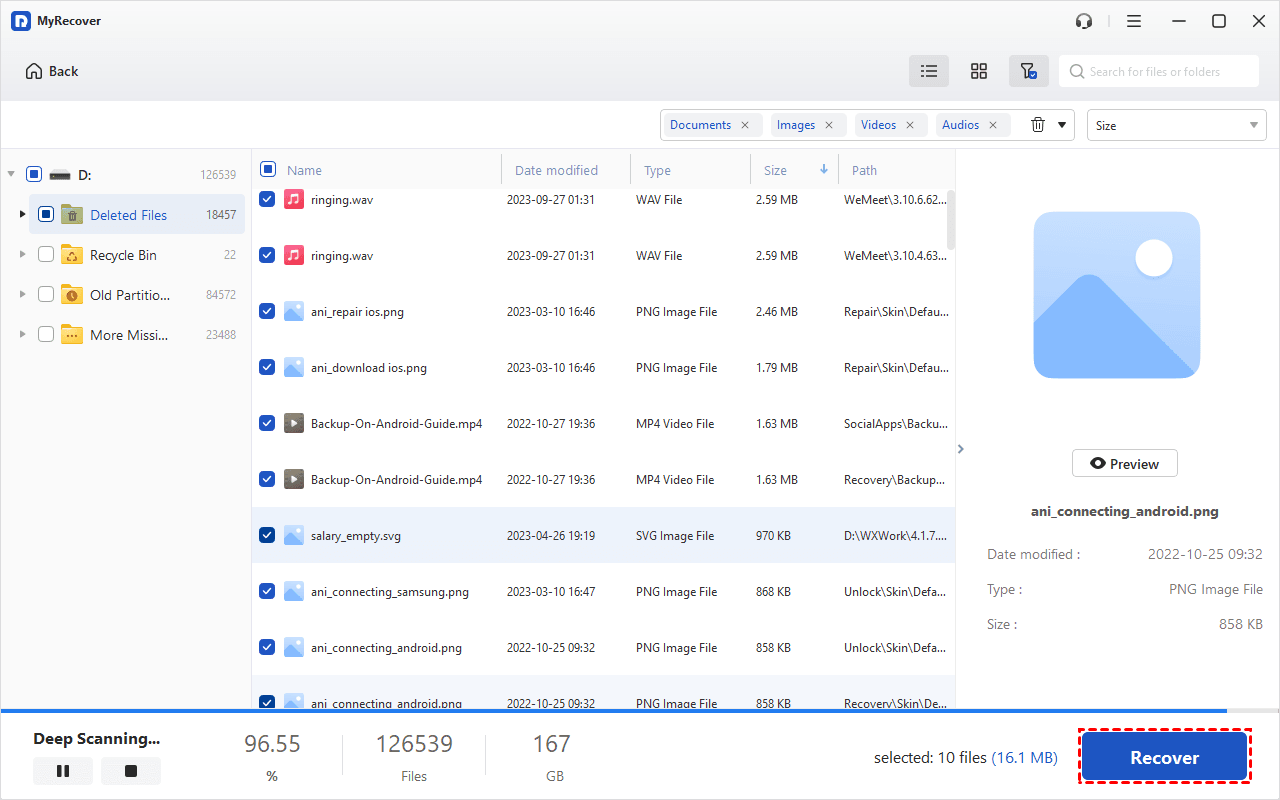
Once found, double-click them to preview and select the desired files by ticking the checkboxes or leaving the unwanted files blank. Then, click the Recover button and select a new location to save the recovered files.
Conclusion
When dealing with data on TRIM-enabled SSD, you need to be twice as careful as any “deletion” action will trigger erasure sooner or later. Thus, if you don’t want to lose any important data on the SSD, you need to act quickly and recover deleted files from SSDs with TRIM-enabled before actual erasure.
MyRecover will be a good choice as it integrates two scanning technologies to help scan and retrieve data on the SSD drive. It somewhat determines the success rate. In addition, its new user interface, interactive experience, and feature set reduce scanning time and speed up file recovery.

