
Fixed: Recovered Videos Won’t Open After Windows File Recovery (2025 Guide)
If videos recovered using Windows File Recovery won’t play, they might be incomplete or corrupted during the process. This guide lists common reasons and corresponding fixes. Check them out to fix the issue. Or employ another recovery tool to completely recover videos and play them successfully.
By Emma / Updated on April 25, 2025
How Windows File Recovery Works to Recover Files?
Windows File Recovery is a command-line tool by Microsoft that helps recover deleted or lost files from HDDs, SSDs, USB drives, and SD cards. It uses different scanning techniques based on your storage device and file system.
How it works step-by-step:
- Select Recovery Mode
Regular (NTFS, recent deletions). Extensive (deep scan for formatted or corrupted FAT/exFAT/NFS drives).
- Scan & Filter Files
Use /n to filter by name, orfile type (e.g., *.mp4 to recover video files).
- Save to Another Drive
Prevents overwriting lost data (critical for SSD recovery).
- ★Check more details about Windows File Recovery command.
Why Videos won’t Play after Windows File Recovery Command?
When videos recovered using Windows File Recovery (WFR) fail to open or play, it’s usually due to one of these reasons:
1. Incomplete or Partial Recovery: WFR may only recover fragments of a video if parts were overwritten. If so, the restored videosopens but freezes, shows errors ("Corrupted File"), or has no duration.
2. File Header/Footer Corruption: Critical metadata (e.g., MP4’s ftyp box, AVI’s RIFF header) may be missing.
3. File System Fragmentation (NTFS Only): Large videos split across disk sectors may not reassemble correctly.
4. Codec/Container Issues: The player may lack proper codecs (e.g., HEVC/H.265).
5. Incorrect File Extension: WFR may mislabel files (e.g., .mp4 recovered as .dat).
How to Fix Unplayable Recovered VideosAfter Windows File Recovery
If your recovered videos won't play after Windows File Recovery (WFR), follow these detailed solutions based on the root causeslisted above:
Solution 1. Fix Incomplete or Partially Recovered Videos
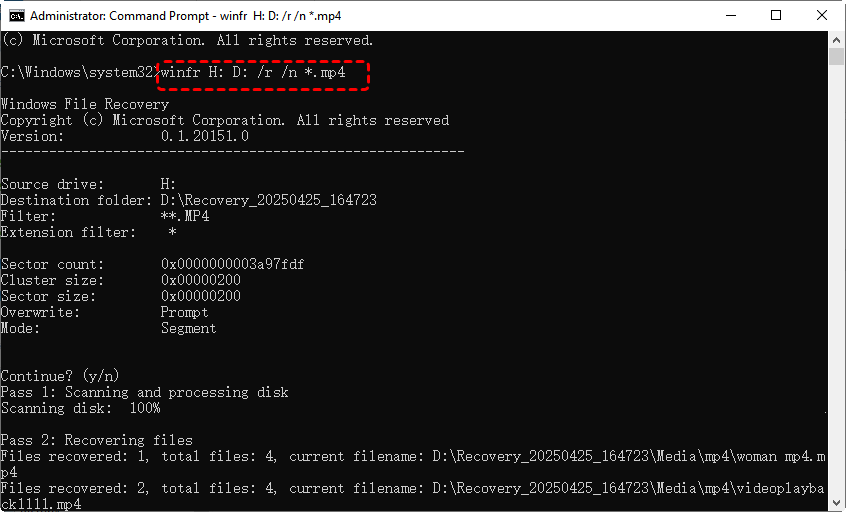
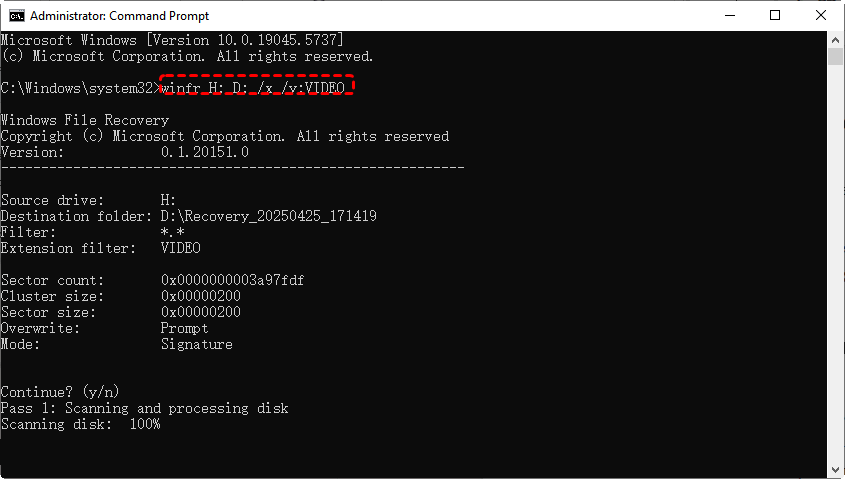
When Windows File Recovery may only retrieve fragments of videos and lead to the playing failure, recover it again with proper mode:
For NTFS drive, use "Segment Mode": winfr H: D: /r /n *.mp4
For FAT/exFAT drives, use "Signature Mode": winfr H: D: /x /y:VIDEO
Solution 2. Repair Corrupted Video Headers/Footers
If the critical metadata (e.g., MP4’s ftyp header) ismissing, the video might beunplayableas well. In this case, you can manually fix the header using a hex editor or use a professional video repair tool.
Manual Header Fix (Advanced Users)
Step 1. Search the internet for a reliable editor (like HXD) and open the unplayable video.
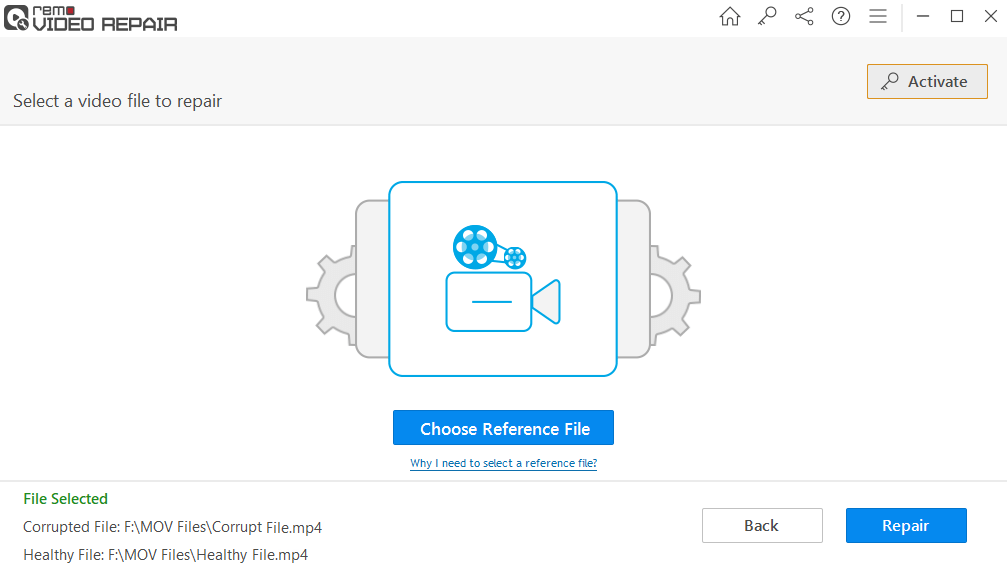
Step 2. Find a working reference video of the same format (for comparison). Compare with a working video’s header and overwrite corrupted parts.
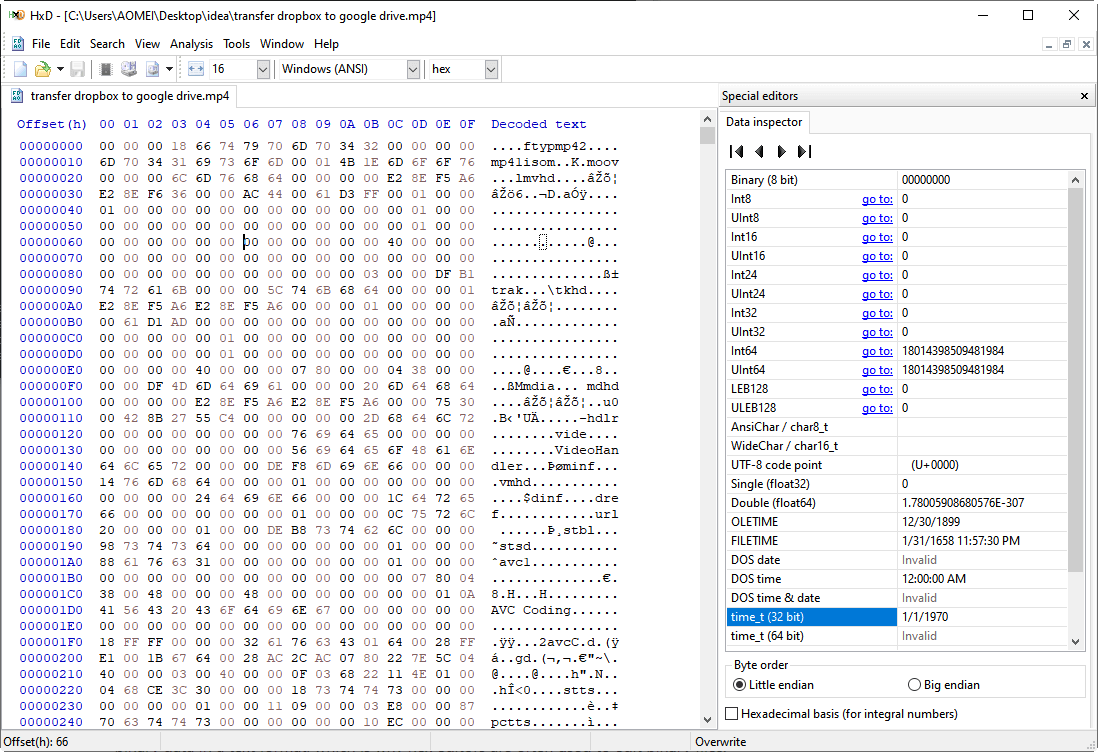
Step 3. Check what your video header should look like:
| Format | Header Signature (First 8-16 bytes) |
| MP4 | 00 00 00 18 66 74 79 70 6D 70 34 32 ("ftypmp42") |
| AVI | 52 49 46 46 xx xx xx xx 41 56 49 20 ("RIFF....AVI ") |
| MOV | 00 00 00 14 66 74 79 70 71 74 20 20 ("ftypqt ") |
Step 4. Open both the corrupted file and a working reference file in HxD. Look at the first 32 bytes (first two rows) of each file.
Step 5. Corrupted files often start with:All zeros (00 00 00 00...); random garbage data; or partial/misaligned signatures.
Step 6. In your corrupted file, select the first 32 bytes (drag mouse in hex view). Right-click it and select "Fill Selection" ->"With Hex Values".
Step 7. Enter the correct MP4 header:00 00 00 18 66 74 79 70 6D 70 34 32 00 00 00 00. Then save As a new file (don't overwrite original!)
Use Video Repair Tools
The above method seems a little difficult for common users. Don’t worry, since there are countless professional video repair tools that can help like Remo Video Repair (best for MOV/MP4) . You can download it from Microsoft store.
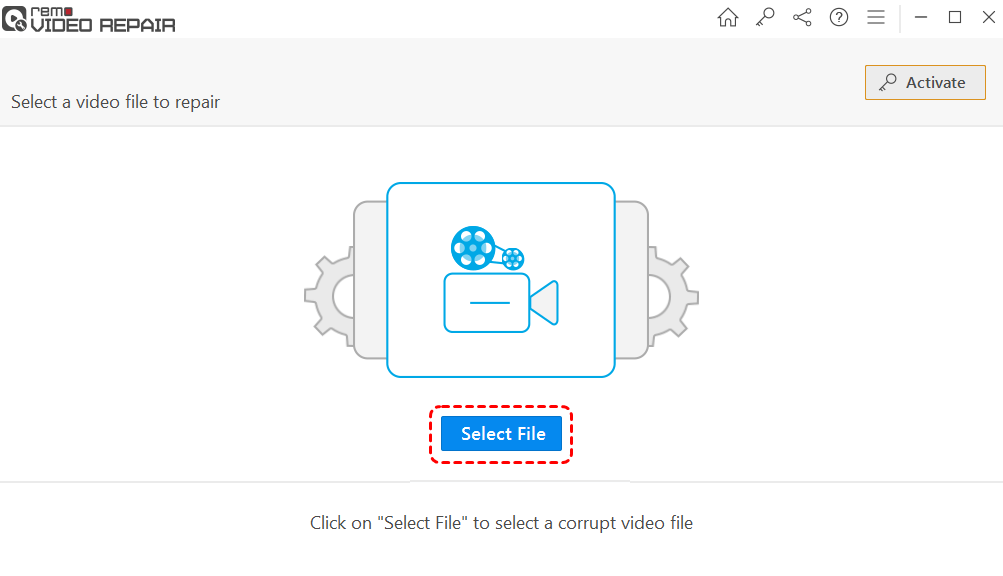
Step 1. Launch the tool and click on the "Select File" option to choose the corrupted video that needs to be fixed.
Step 2. Initiate the video repair process by clicking on "Repair".
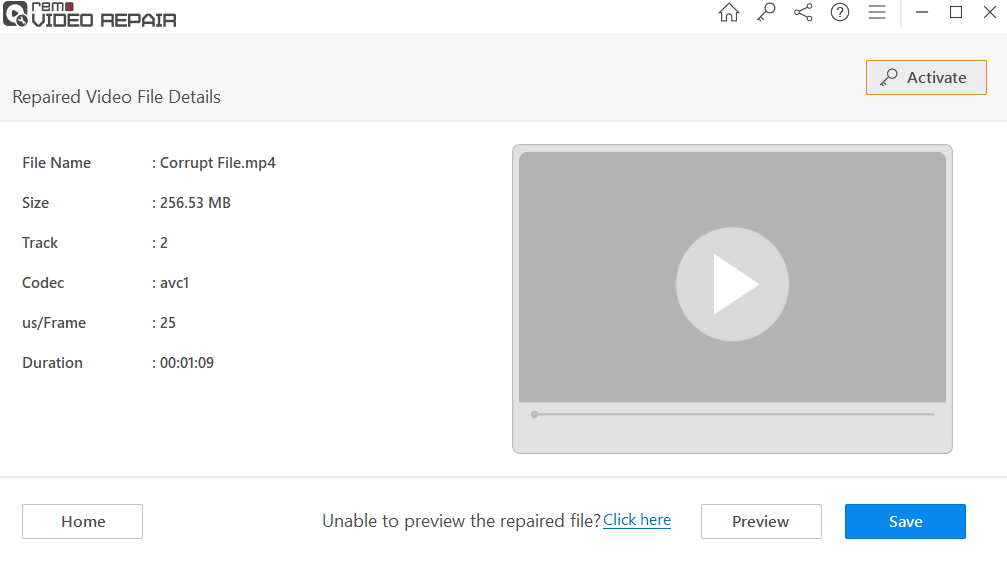
Step 3. After the repair, click "Preview" button to verify the repair result. If satisfied, click "Save" to restore the video.
Solution 3. Fix Fragmented Video Files (NTFS Only)
If you the video recovered by Windows File Recovery is quite large, there might be chance thatvideo is acrosssectorsandmay not reassemble properly. Thus, you can run the commands listed in the solution 1 to recover it again.
Alternatively, run "defrag" commandon the drive before recovery: defrag H: /U /V
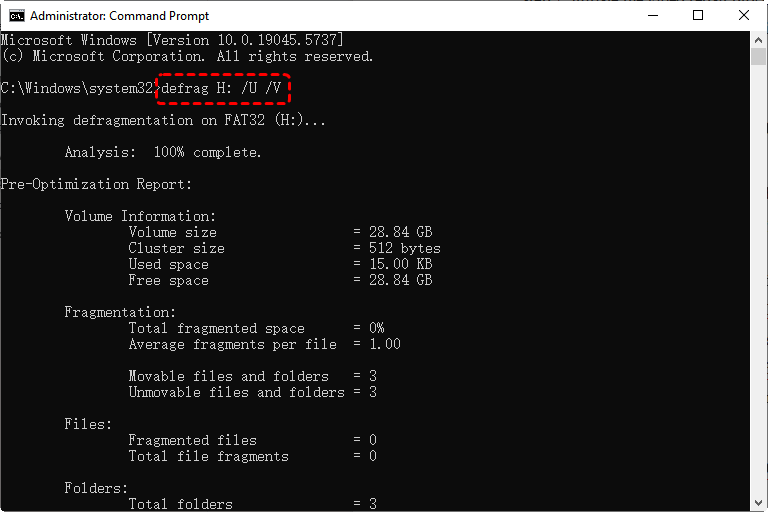
- defrag – The built-in Windows Disk Defragmenter utility.
- H: – Specifies the target drive (in this case, the H: drive).
- /U – Displays the progress of the defragmentation in real-time.
- /V – Enables verbose mode, providing detailed fragmentation statistics before and after defrag.
Solution 4. Resolve Codec & Player Compatibility Issues
If the videos won’t open after Windows File Recovery since they use an unsupported codec (e.g., HEVC, AV1), you can try playing it with Play with VLC/MPV/PotPlayer, which handle corrupted files better than Windows Media Player. Or convert the video toa standard format via a reliable video converter.
Solution 5. Fix Incorrect File Extensions
Windows File Recovery (WFR) sometimes struggles to properly recognize file types during the recovery process. This limitation often leads to all recovered files being automatically assigned generic extensions like .dat or .chk, regardless of their actual file format.As a result, the videos won’t play after Windows File Recovery. To fix it, you need to manually verify and correct the file extensions.
Step 1: Identify True File Types:
Use professional tools like“TrID”, or “Hex Editor (HxD)”.Scan recovered files (e.g., ".dat" or ".chk") using:
- TrID: Run “trid cd D:Recovery_20250425_164723*” to detect actual formats.
- Hex Editor: Check file headers manually: MP4starts with 00 00 00 18 66 74 79 70 ("ftyp"), AVIbegins with 52 49 46 46 ("RIFF") and MOVlook for 66 74 79 70 71 74 ("ftypqt")
Step 2: Rename Files Correctly
- For Single Files: Right-click the file →Rename → Change extension to the correct one (e.g., ".dat" → ".mp4").
- For Batch Renaming (PowerShell):
cd D:Recovery_20250425_164723
Get-ChildItem -Filter *.dat | Rename-Item -NewName { $_.Name -replace '\.dat$','.mp4' }
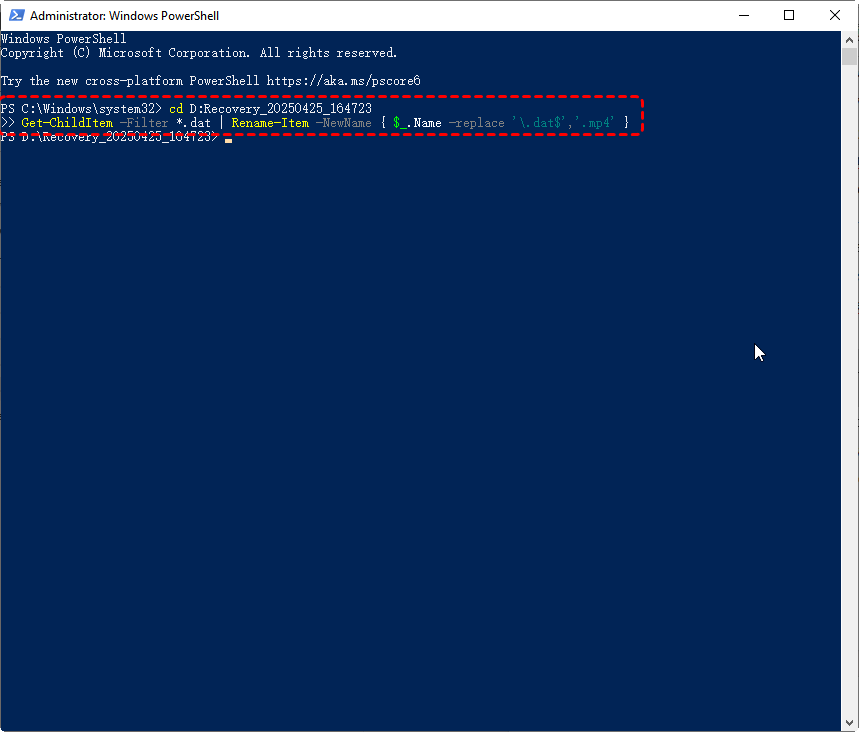
Replace “.mp4” with the correct extension for your files.
Step 3: Verify File Integrity
Open renamed files in“VLC Media Player” (supports corrupted files). If playback still fails, please recheck headers with a hex editor, or use video repair tools like Remo Video Repair .
MyRecover: Recover Videos Completely with Smooth Playback
Losing important videos due to accidental deletion, formatting, or system crashes can be frustrating—especially when recovered videos won’t play properly. MyRecover is a powerful yet user-friendly data recovery tool, which can fully restore videos while maintaining their original quality and ensuring they can play as before.
Why Choose MyRecover for Video Recovery?
✅ Deep Scan Technology – Recovers fragmented video files (MP4, MOV, AVI, MKV, etc.) without corruption.
✅ Cover Most Data Loss Situations- Recovers data from accidental deletions, formatted drives, unrecognized RAW devices, system crashes, and virus attacks.
✅ Original Quality Retention – Preserves resolution, bitrate, and metadata for smooth playback.
✅ Preview Before Recovery – Verify videos before saving to avoid incomplete or corrupted files.
✅ User-Friendly Interface – No technical skills needed—just select, scan, and recover.
✅ High Success Rate – Even works for formatted drives, crashed systems, and corrupted SD cards.
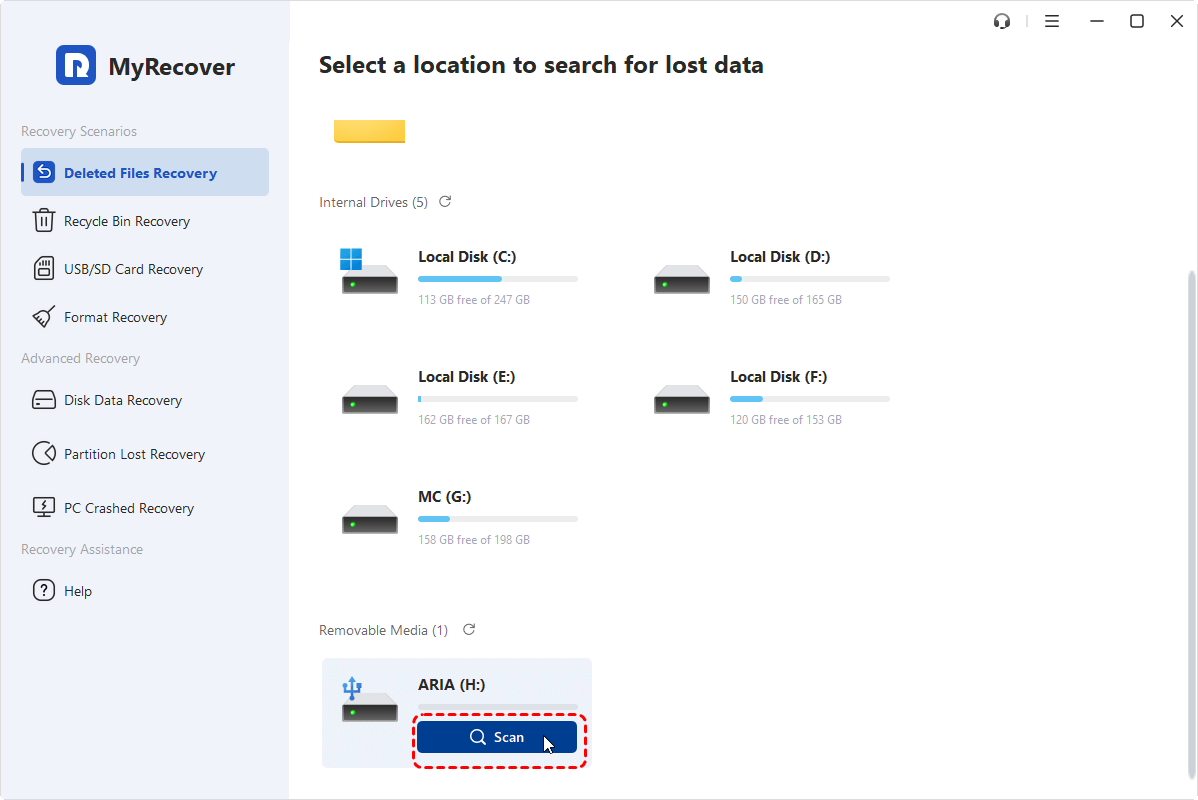
Step 1: Select the Drive & Scan for Lost Videos
Launch MyRecover and select the target drive where your videos were stored, then it will initiate either a Quick Scan for recently deleted files or a Deep Scan (you can also manually choose this mode) for more complex cases like formatted drives. The deep scanning process thoroughly examines every sector to locate recoverable video fragments while maintaining file integrity.
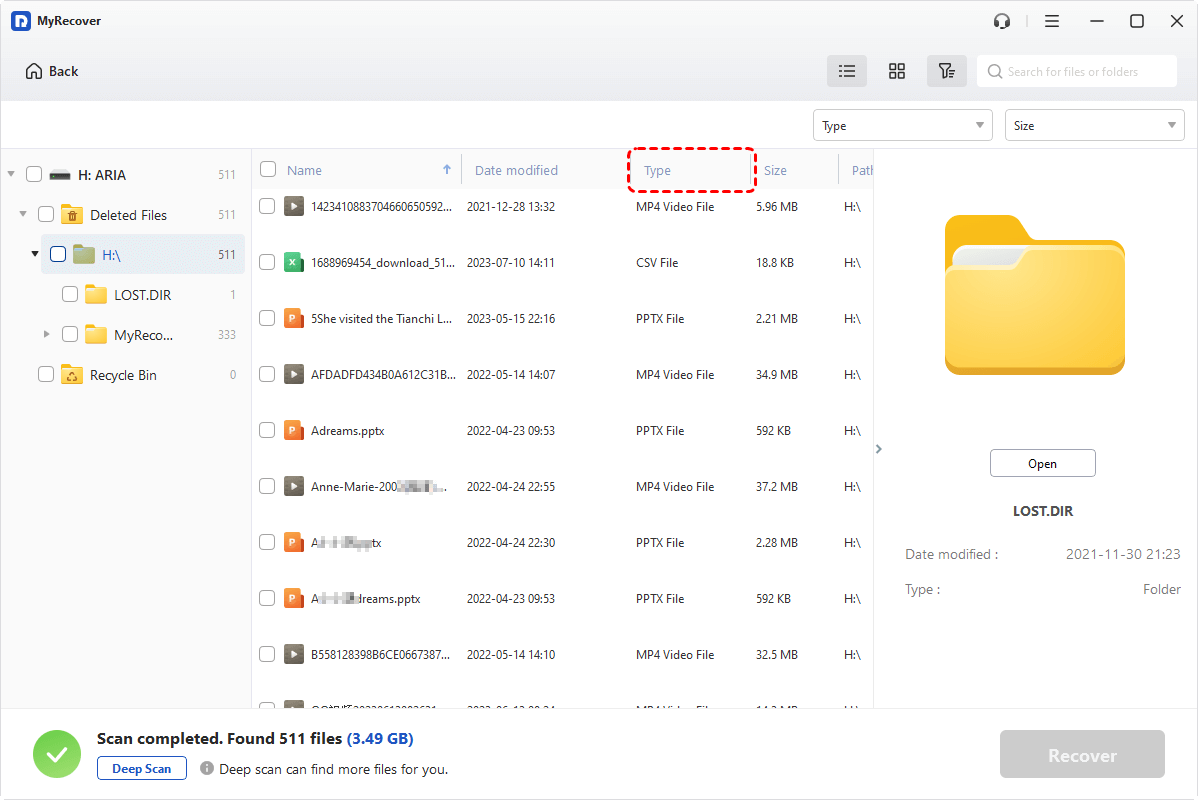
Step 2: Preview & Select Videos for Recovery
Once the scan completes, use the built-in filter to display only video files (MP4, MOV, AVI, etc.) and preview them to verify their quality before proceeding with recovery. This crucial step ensures you only restore complete, playable videos rather than corrupted or partial files.
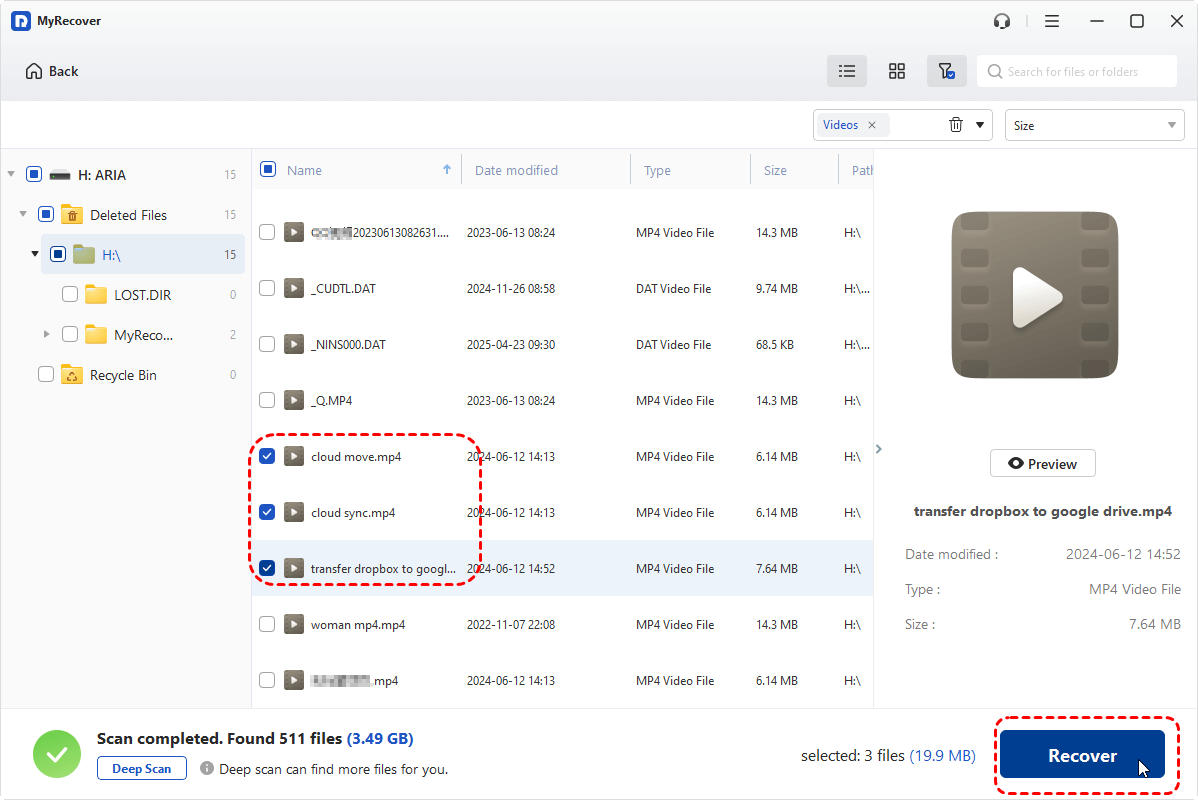
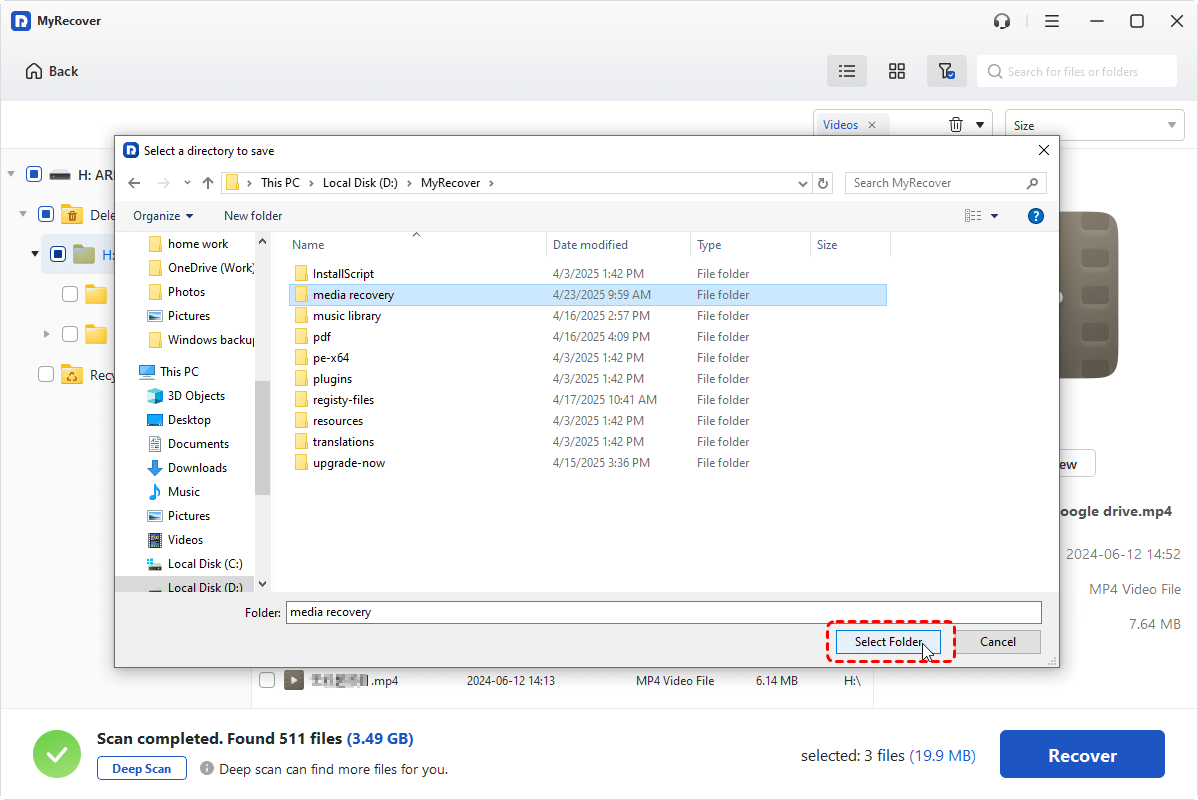
Step 3: Recover & Save to a Secure Location
After selecting the desired videos, click "Recover" and save them to a different drive to prevent overwriting any remaining lost data that hasn't been recovered yet. Always recover to a separate storage device to maximize successful retrieval of your files.
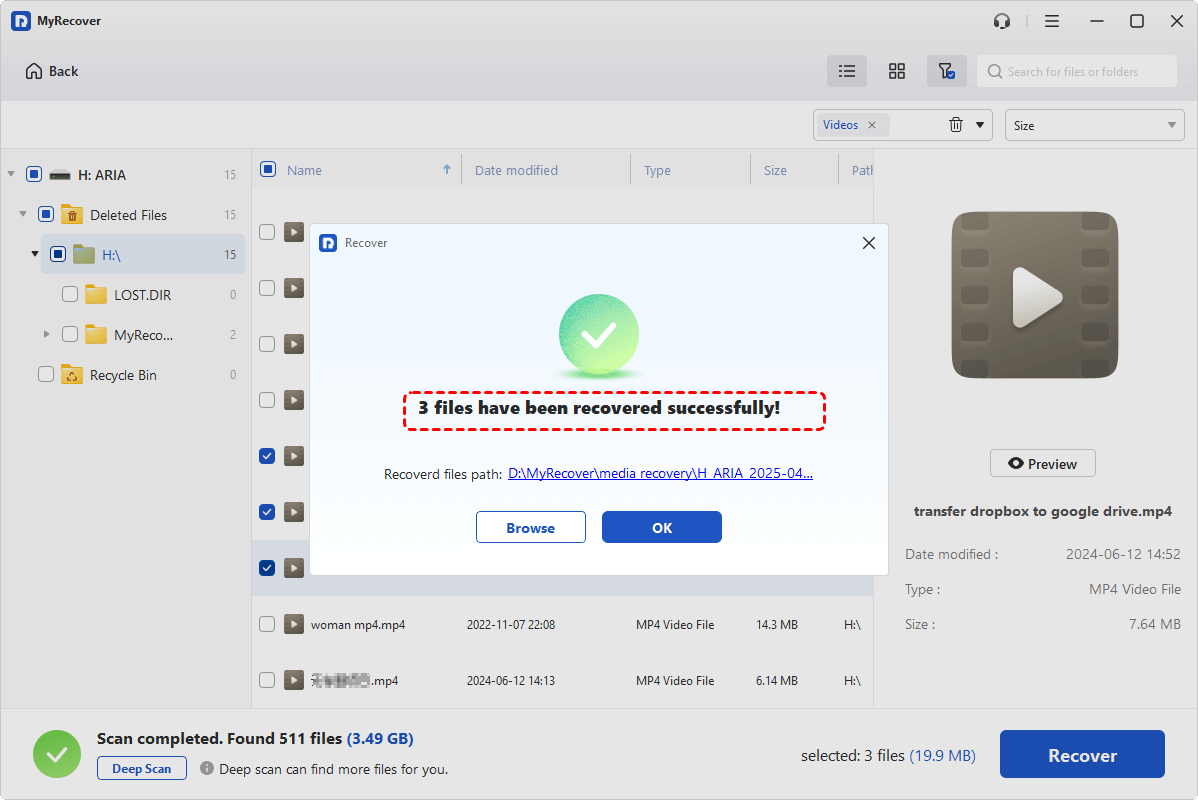
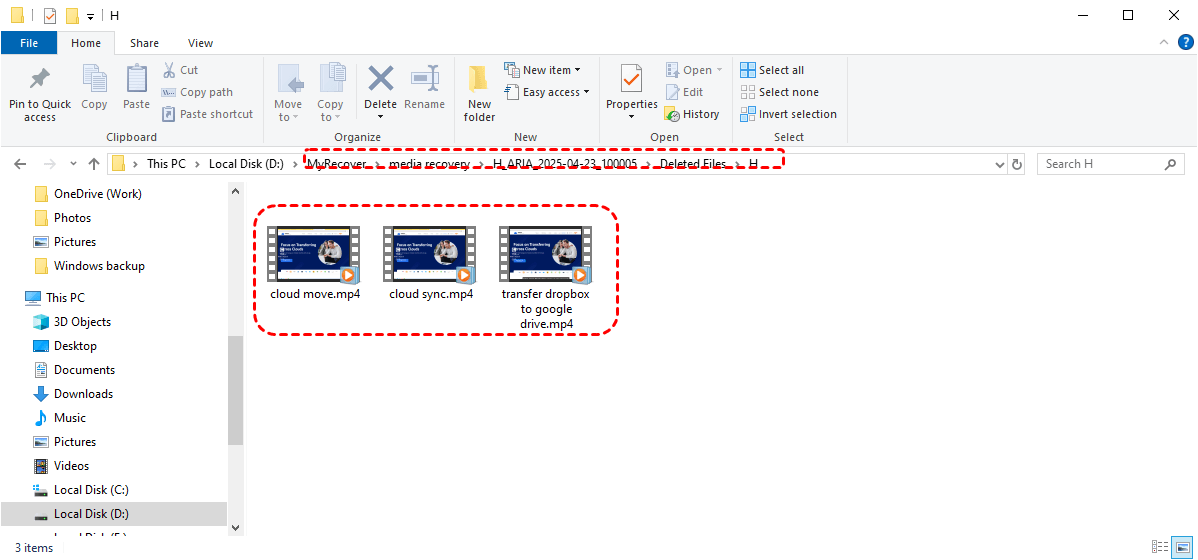
The recovered videos maintain their original quality with no missing frames or playback errors.
Summary
While Windows File Recovery can help retrieve lost videos, its technical limitations often lead to corrupted or unplayable files. For guaranteed resultsand avoid “videos won’t open after Windows File Recovery”issue, use MyRecoverinstead, whichoffers a superior solution—combining deep scanning with intelligent reconstruction to restore videos in perfect condition.
Whether you're dealing with accidental deletions, formatted drives, or system crashes, MyRecover ensures your videos are recovered completely and play smoothly without errors. Apart from recovering videos, it is able to recover music, PDF, PPTX, emails, zips and other types of files (up to 1000 + formats).

